A year ago I bought some Raceseng Camber Plates for my car to allow me to get some extra camber adjustability out of the front suspension. What I received were some functional parts that were machined to a level of such perfection and beauty, that I wasn’t sure whether I should install them on the car, or mount them on my living room wall as “art.” Needless to say, I was very happy with that purchase. Ever since then, I’ve been eyeing their various shift knobs as a way to take advantage of the “pretty” side of their machining processes to add a little flair to my interior. When they came out with their “Custom Shop” a few months ago, which allows you to specify pretty much any combination of shift knob style, color, and finish, the temptation became too great, and I decided to order myself a little birthday present!
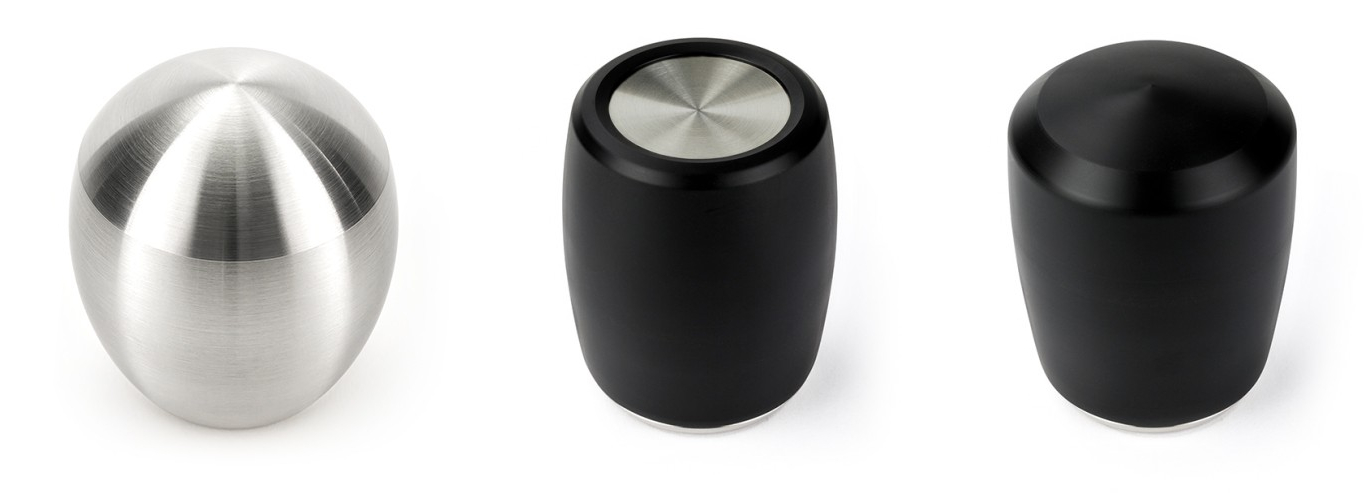
Photo above courtesy of Raceseng.
The first thing to do was to pick a shift knob style, of which there are quite a few. When it comes to the outer material, I consider them falling into three categories (represented by the three examples depicted above.) The first is a “full metal” body. Arguably, these look the coolest, but they have the distinct disadvantage of turning into little balls of fire in the summer, which will brand the shift-gate pattern into your hand, or give you frostbite in the winter. The opposite of this would be a full Delrin exterior, with a metal core. This keeps the shift knob temperature more neutral, but isn’t [in my mind] particularly pretty. Halfway between those two styles is the one depicted in the center. A screw-on Delrin cover still keeps the bulk of the knob cool, but the top is exposed to allow the metal finish, with shift gate engraving, to show.
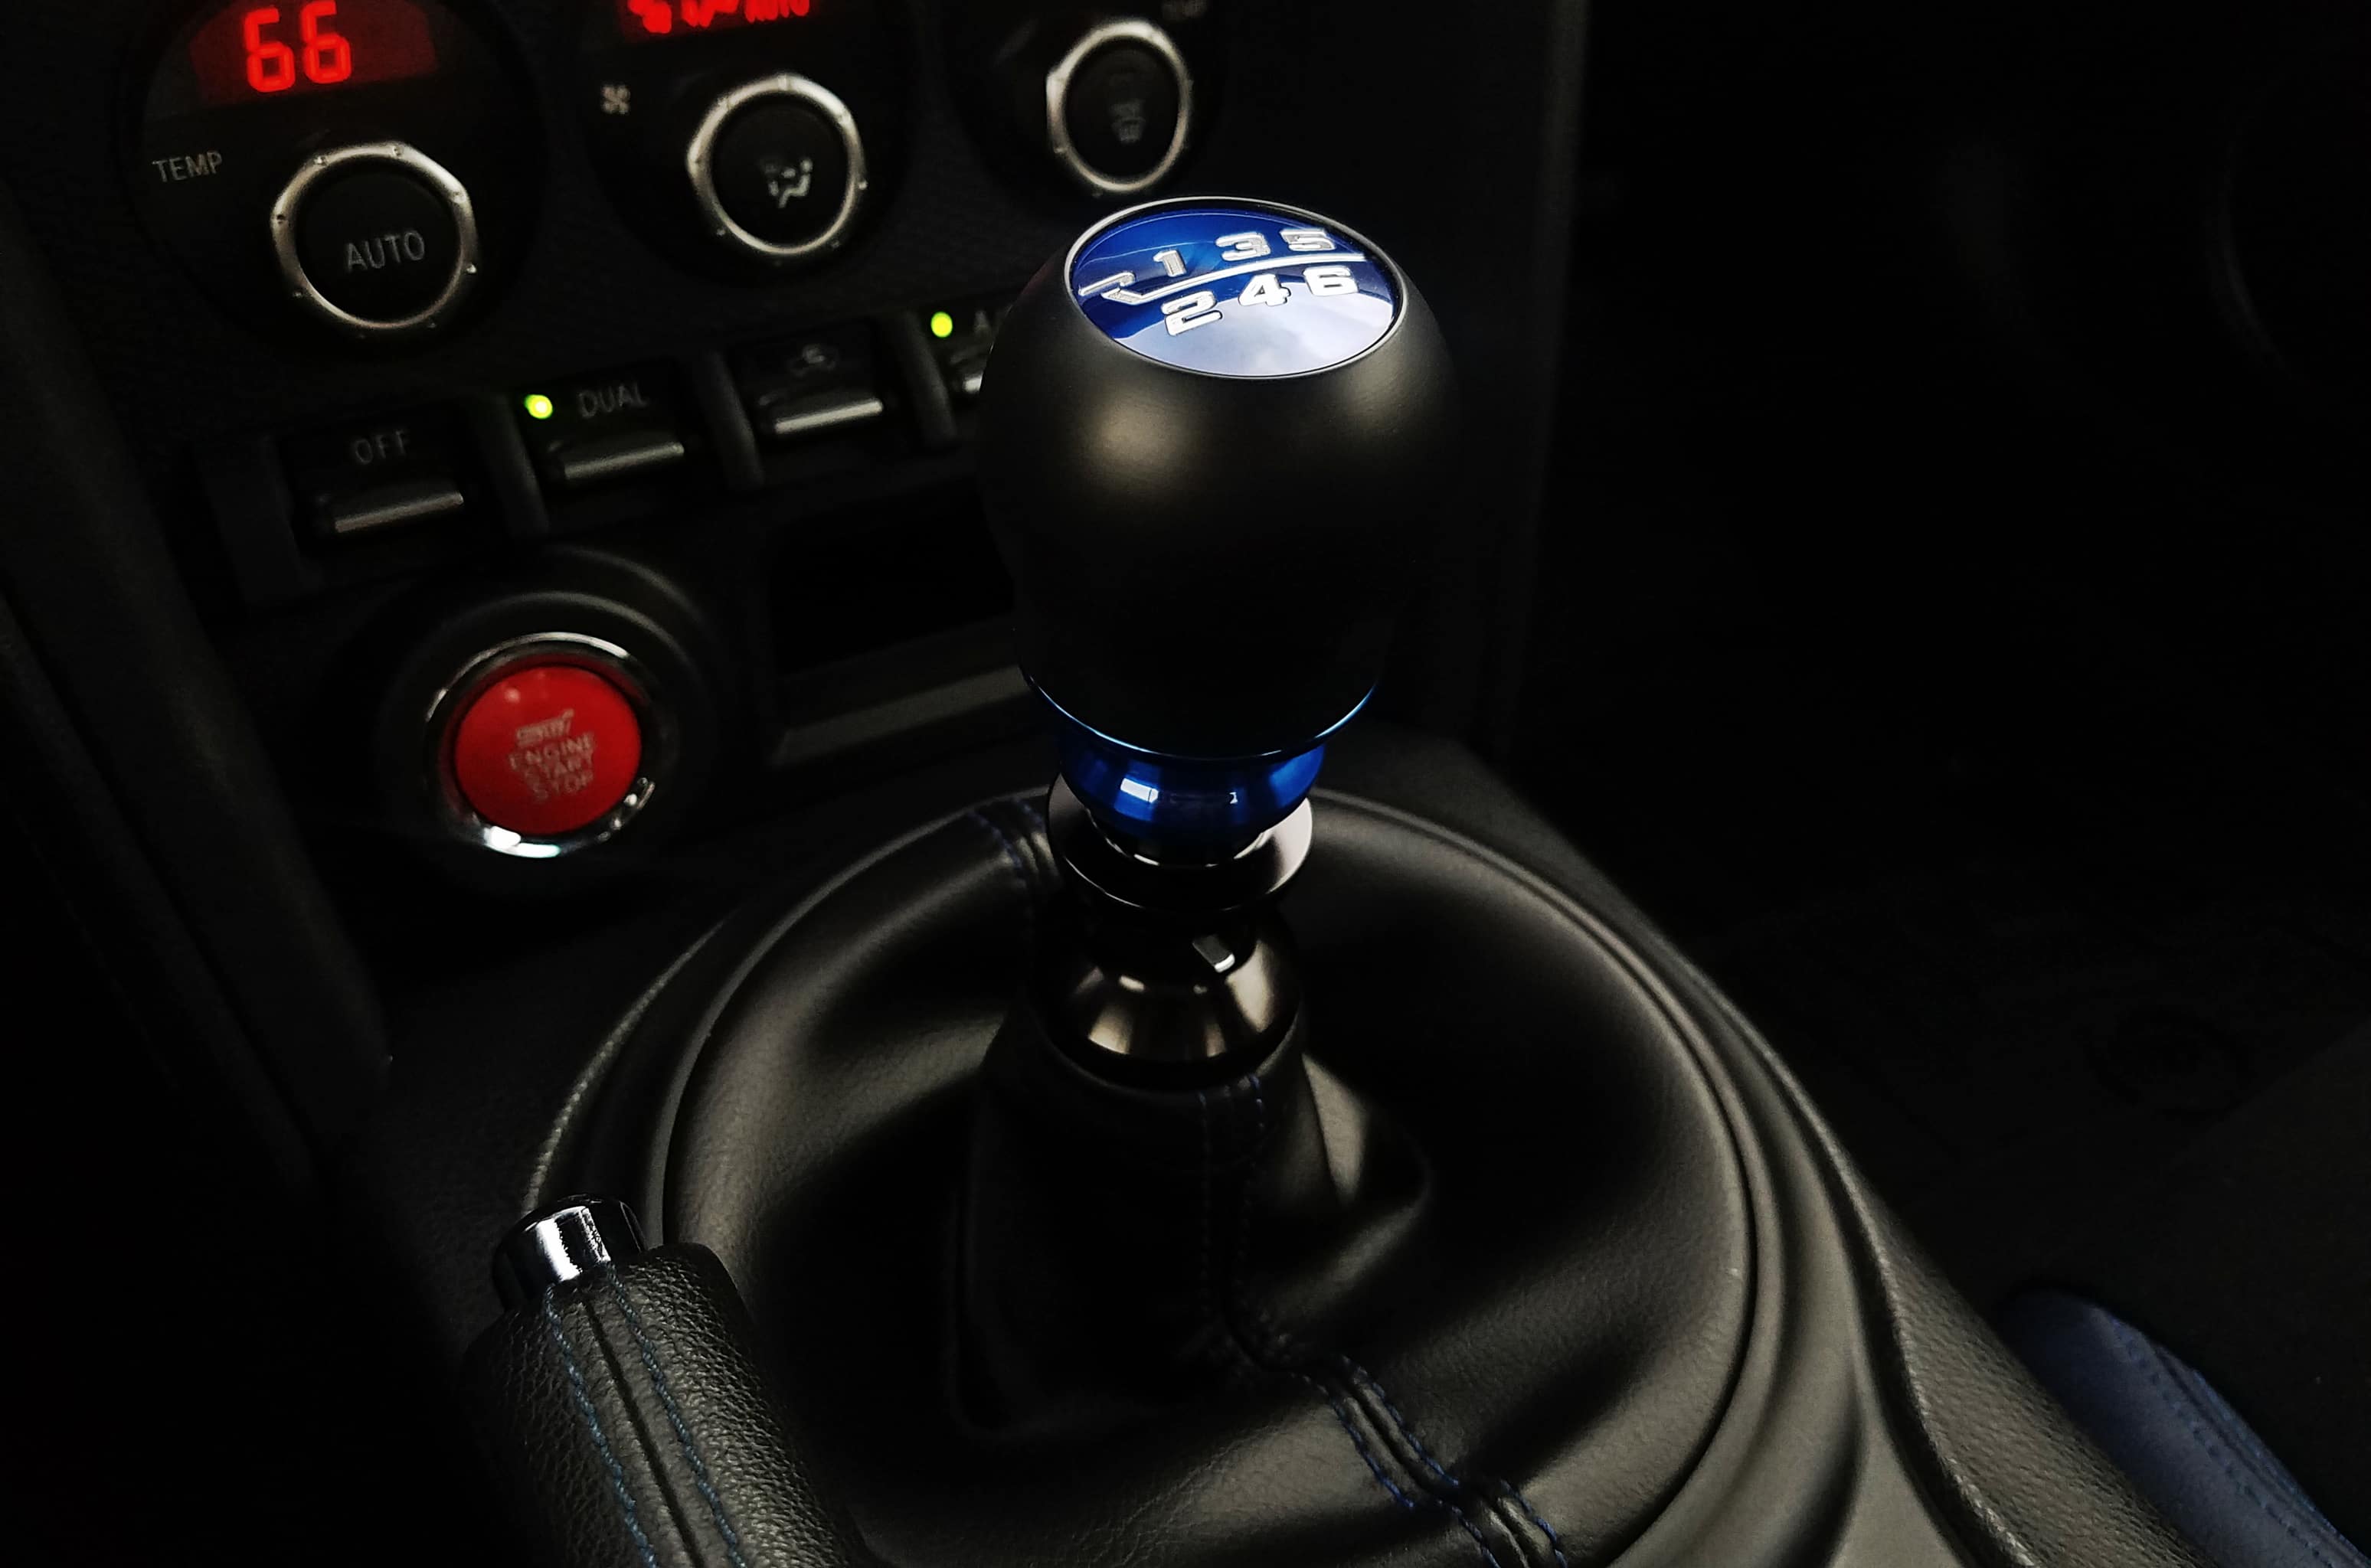
I decided to go with the latter. Specifically, their Sphereology knob. I thought the rounded design would fit better in hand, and look good without being too flashy. Once that was decided, I had to pick a color and finish. Naturally, I had to select blue, and went with the translucent finish, which has nice depth to it. Lastly, I selected the shift-gate engraving that matched my proper layout. I also ordered a black reverse lockout collar to replace the stock plastic collar, in order to complete the look. Raceseng parts are not cheap, and the total for all of this was $227, but I knew I was getting quality parts made in the USA, so I was willing to take the plunge (especially considering the shift knob is something I interact with more than pretty much anything other than the steering wheel.) Once the parts were ordered, I had to wait 5 weeks for them, but the wait was well worth it!
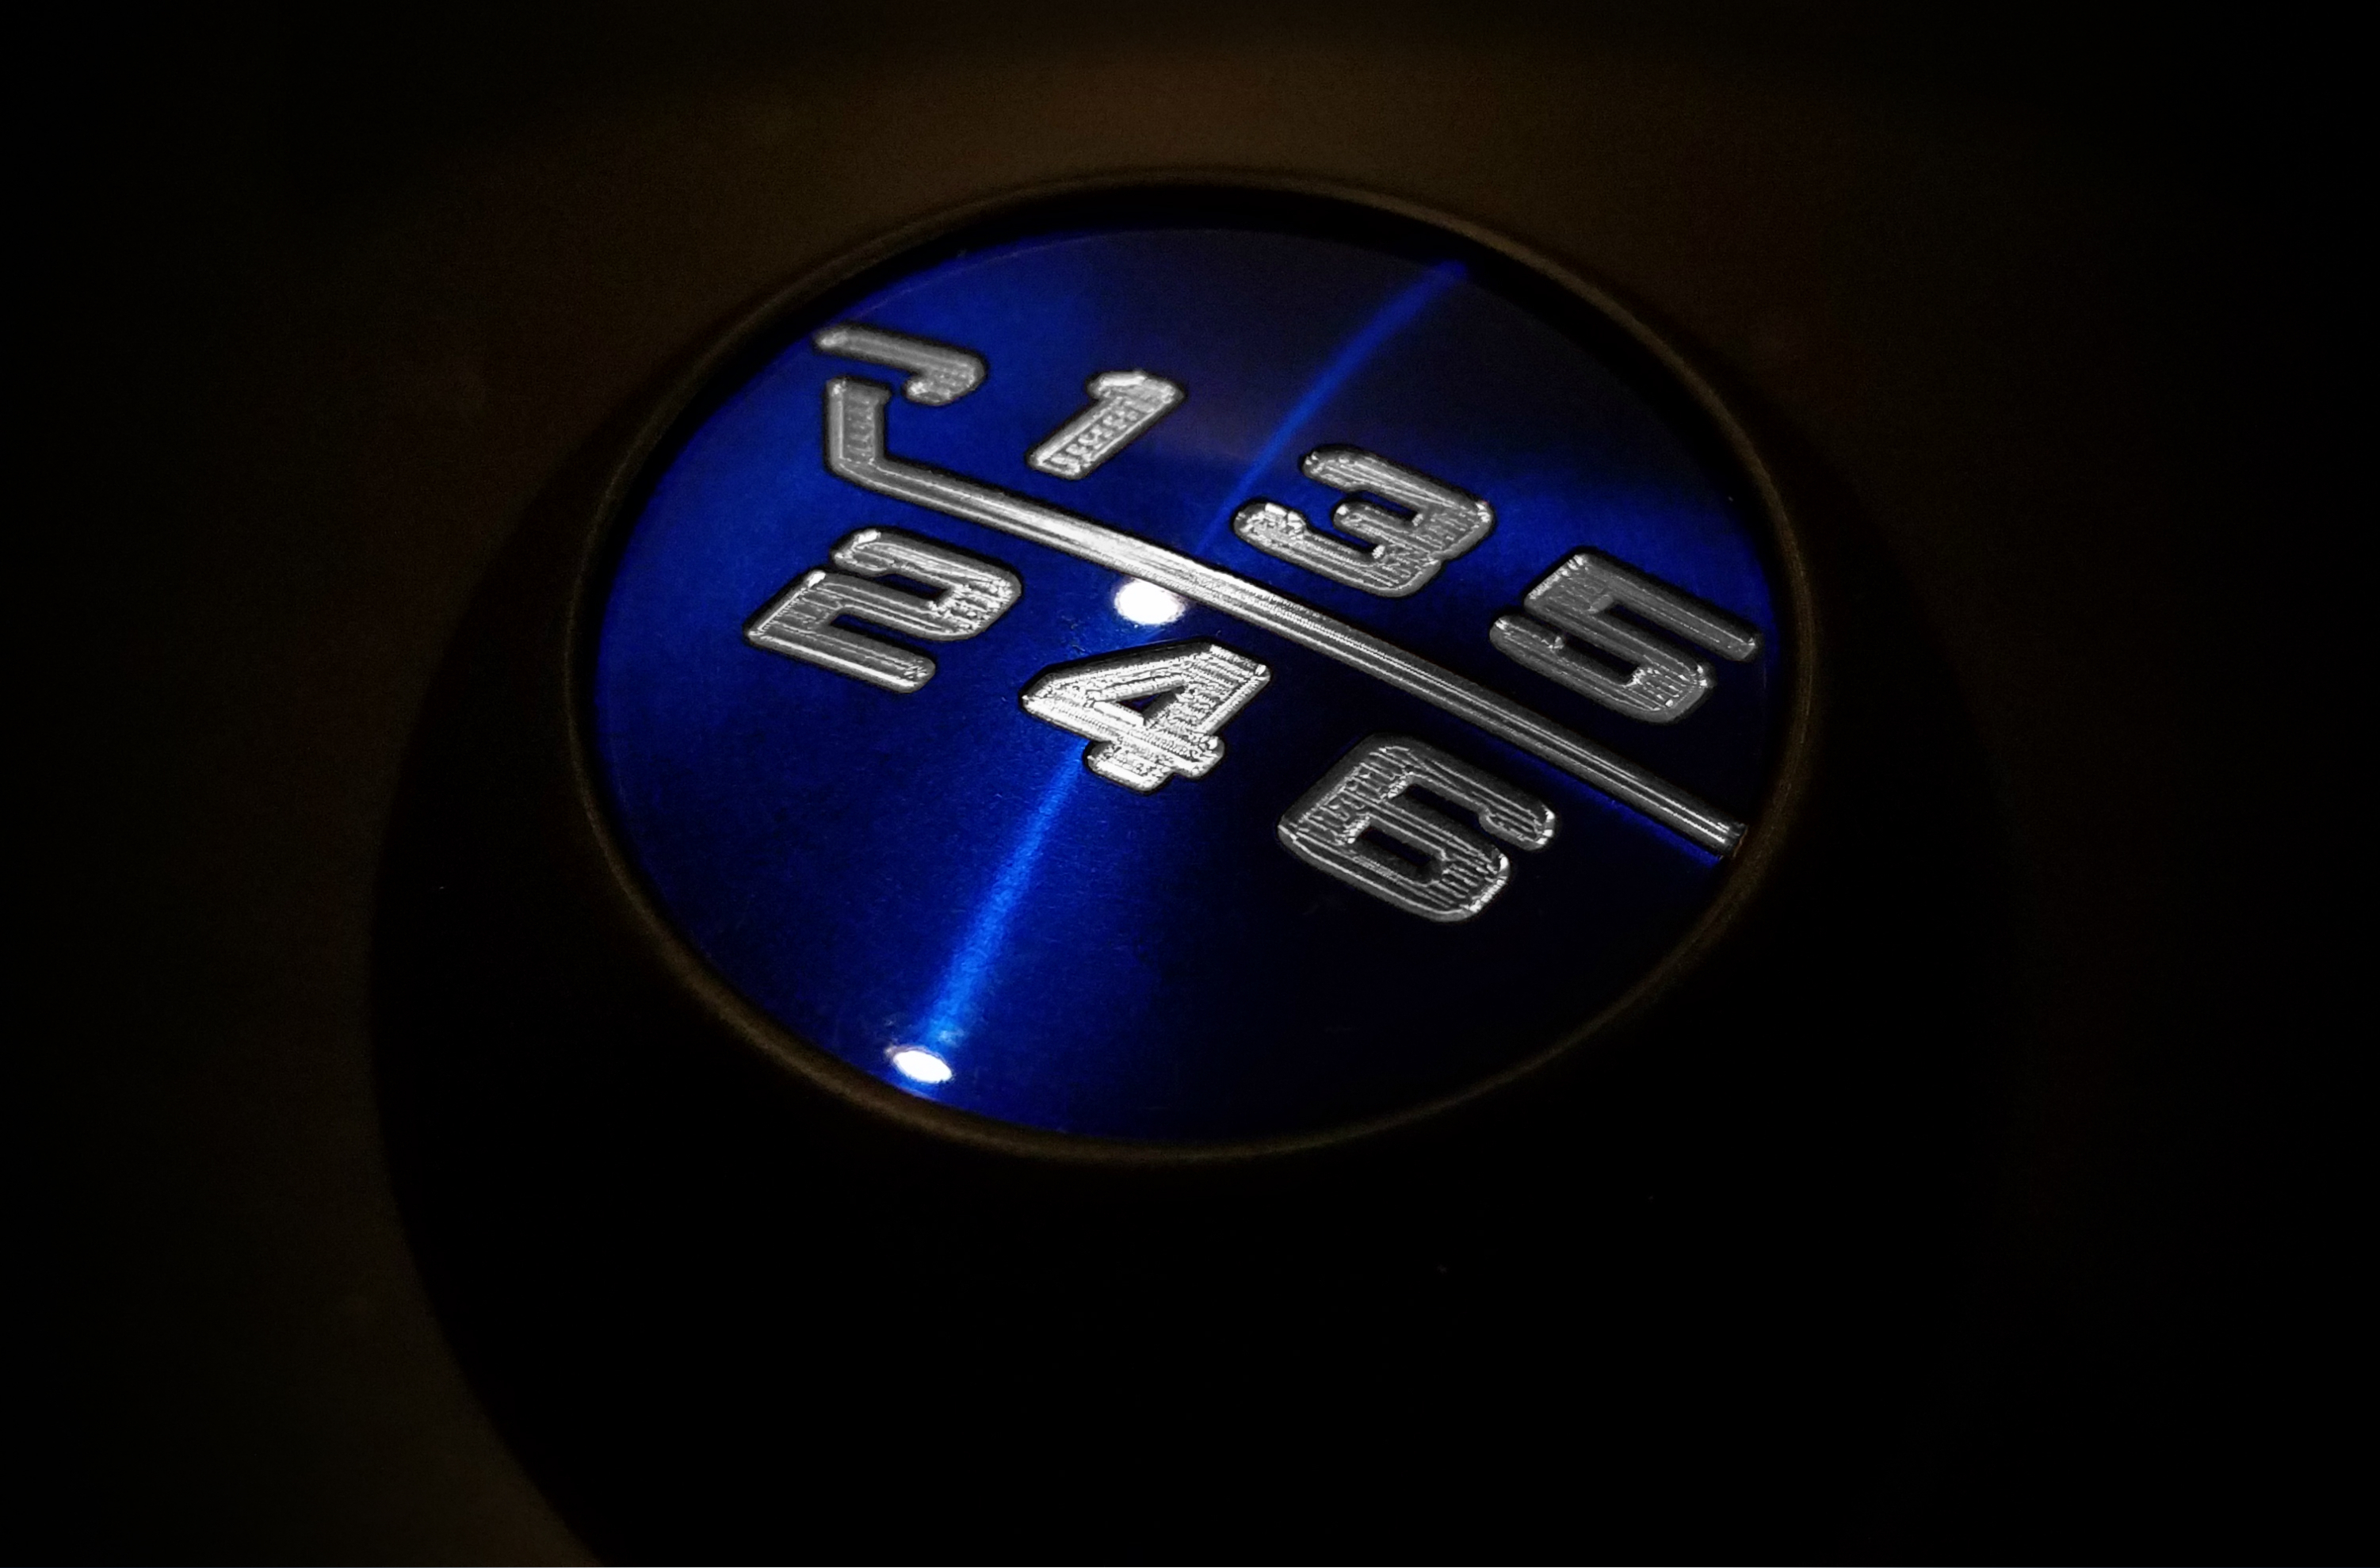
The final product is absolutely beautiful. As you can see in the photos above and below, the fit and finish is pretty much flawless. The engraving at the top is gorgeous, and the blue finish at the top and bottom of the shift knob is a beautiful, deep blue color. The reverse lockout is also a huge improvement over the stock plastic one. The stock shift knob is around 200 grams in weight. This one is 475 grams, which is a significant increase. Some people prefer a lighter shift knob, but I’m quite enjoying this weighted knob, as it helps smooth out the notchiness of this shifter (especially now that I have a new transmission), and makes shifts a bit more effortless.
Installation is very straightforward, but I want to give a brief overview because it isn’t quite as simple as unscrewing the stock knob and screwing the new one on in its place. A brief overview of the steps is as follows:
- Unscrew, and remove the shift knob. Then pull down on the shift boot to remove it from the bottom of the reverse lockout collar. Then shift the car into reverse (this will hold the reverse lockout in the proper position when you remove the stock collar.)
- To remove the collar, there is a tiny roll pin inside of the hole on the front of the collar. You need to use a 2.5mm punch to hammer that out. Do yourself a favor and get the right size punch and have a hammer handy. It is pretty secure and does NOT want to come out easily.
- With that pin removed, you can swap collars. The Raceseng collar uses a screw, rather than a pin, to secure it in place. At this point you can re-install the shift boot cover onto the new reverse lockout, and then bring the shifter back to neutral.
- The shift knob comes with a separate threaded adapter. You screw this adapter onto your shift lever, and it has larger threads on it which in turn are what the shift knob screws onto. At the top of this adapter is a screw that you can adjust. This slightly adjusts how far you can spin the knob onto the adapter, which is how you get the shift gate pattern facing the correct direction.
The whole process only took a few minutes, and I’ve had it in the car for a few weeks now and I love it! Below are some more photos, including a slightly overexposed one to give you a better look at the finish. Overall, I’m very happy with the purchase, and would definitely recommend these to anyone in the market. No, they aren’t cheap, but it’s nice to support a smaller company that makes quality products. (Also, their customer support is utterly fantastic. When I initially received this shift knob, it had a few small scuffs on the finish. They were so small that I didn’t really care, but as soon as I reached out to them, they prioritized the manufacture of an entirely new core, and sent it out to me without any questions asked!)

“Would ya just look at it!”

Overexposed to show the finish.