I finally got around to installing a dash cam in my car. This is something I had originally meant to do right when I purchased the car, but priorities shifted and I never got around to it. Finally, after a few close calls recently, I decided to bite the bullet. There are several reasons I wanted a dash cam:
- The sports car effect. When you drive a sports car (much less one that has been obviously modified), one of the things you have to contend with are boy racers driving like complete morons. I swear this is 90% Mustang drivers for whatever reason, but these people will randomly start trying to race you on the highway, and drive like complete morons to demonstrate their superiority. I even had someone do a massive, stationary burnout next to me at a red light in traffic once (yes, it was a Mustang.)
No thanks, random person. I have no intention of racing you and your lowered Civic with the massive wing and the obnoxiously loud exhaust. Needless to say, I don’t want to be pulled over for “street racing” just because a cop happens to see me in the same vicinity as someone driving like a complete moron. At least with a dash cam, I’ll be able to show that I wasn’t doing anything. - The young driver effect. This is fairly self-explanatory. Even when people aren’t actually trying to race you, or show off, they still drive like complete morons. Especially in a major city such as Chicago. Needless to say, if I wind up involved in an accident that isn’t my fault, I want to be able to prove it. When you’re a young driver in a sports car, people [rightfully] assume it was probably your fault. I’m not the perfect driver, but I definitely don’t want to be blamed for something that was the result of someone else’s stupidity.
- Fun. Let’s be honest. We all see crazy stuff when we’re driving. In Chicago, you see it even more frequently. I’ve seen so many things that I wish I could have captured on video, and now I can!
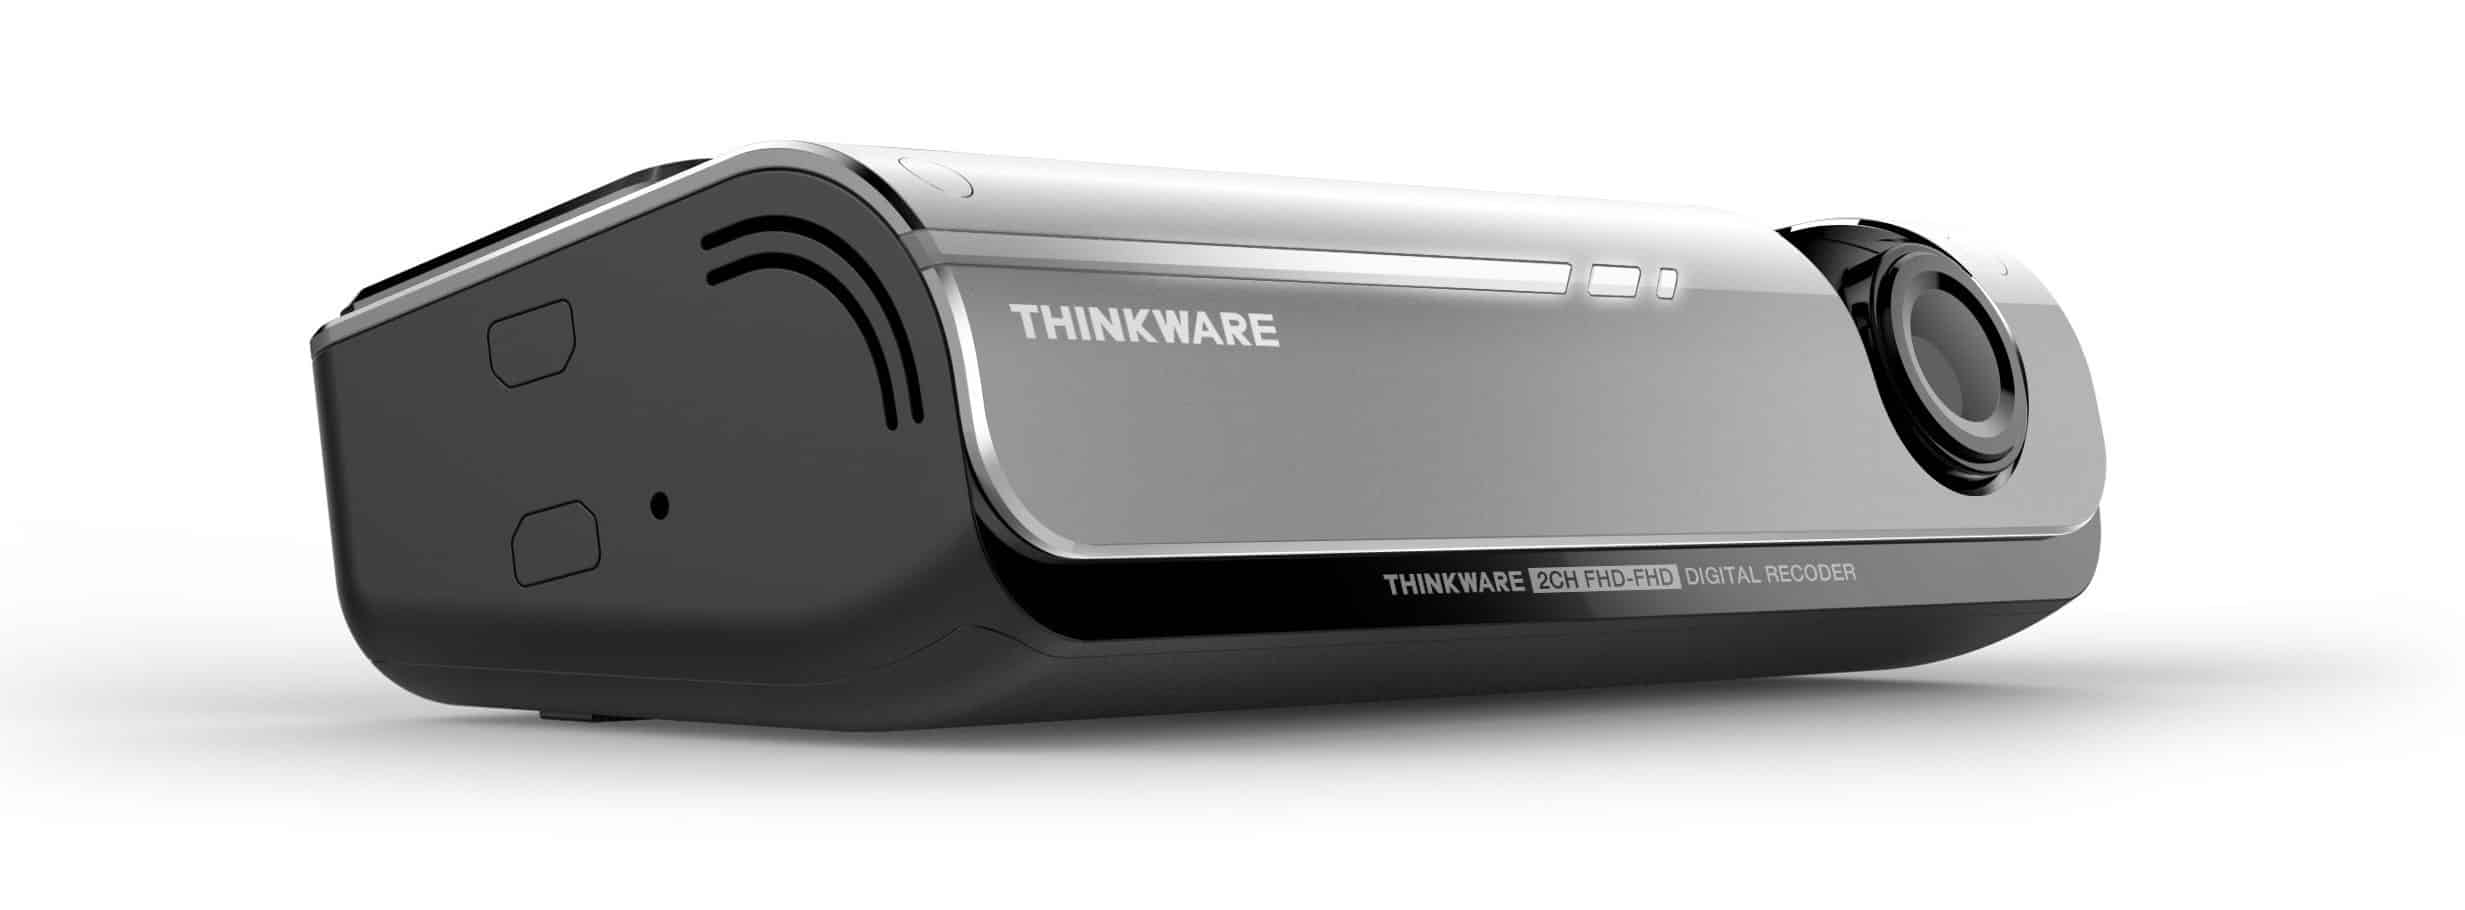
Thinkware F-770 Dual-Channel Dash Cam
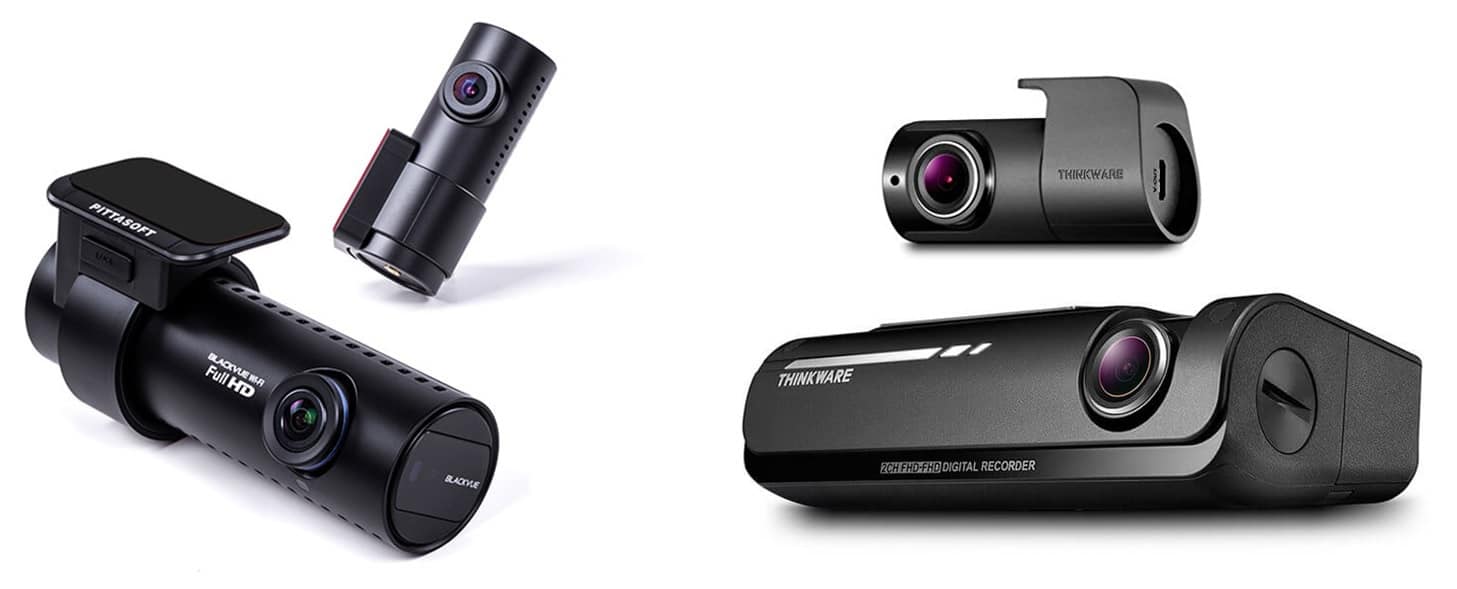
It took me a while to decide which camera to buy. The first decision I made, though, was that I wanted a two-channel system that would record the view out of both the front, and rear windows. Too often, road rage incidents start when you accidentally cut someone off, or intentionally do because they don’t want to follow the zipper-merge rules, etc… I want to have that context too, if necessary. This decision at least narrowed the potential playing field, and in the end it came down to two cameras: The BlackVue DR650S, or the Thinkware F-770 (both being the latest cameras offered by their respective companies). The BlackVue was the more popular of the two cameras, with lots of positive reviews, but the reviews on the Thinkware were good too, and I eventually settled on the latter merely because I preferred the form factor. The BlackVue is a cylinder that mounts to the windshield with a bracket, which places the camera body back from the windshield slightly. The Thinkware is a “flat box” which mounts directly to the windshield itself. This makes the Thinkware a lower profile camera, and a bit stealthier and “cleaner” to install in the car. I wanted something that was as invisible as possible, and something that wouldn’t be an obstruction from inside the car, and this camera fit the bill. It actually looks a bit more OEM too.
I ordered my camera from BlackBoxMyCar.com, and it cost me just shy of $394.99 (I later ordered a 64 Gb Thinkware Micro-SD card for an additional $70, meaning around $465 total.) Definitely not cheap, but this is far from a basic dash cam. You can read all of the specifications here, but the pertinent features are: Full 1080P recording front AND rear, two parking modes, speed camera alerts, lane-departure warning, front collision alert, GPS speed, WiFi with smartphone app, capacitor-based power supply, and “super night vision.”
A note about BlackBoxMyCar: These people are great to deal with, and I always point people to their site. They have absolutely fantastic customer service, and even though they ship from Canada, the shipping is quick. Their site is actually a great place to do research as well. They do lots of blog posts where they review various cameras, and they have lots of links to other resources. If you’re a total newcomer to dashcams, and don’t really know what you’re looking for, you can use the site as a jumping-off point for all of your dashcam research, or just contact them directly for help.
Mounting the Cameras
Installation wasn’t terribly complicated. In fact, it wasn’t difficult at all. If you’re just going to power your dashcam from the cigarette lighter outlet, then you stick the camera to the windshield, and plug it in. If you have a rear camera, then you stick the rear camera on the rear window, and then run a USB cable to it (typically by tucking it under the headliner along one side of the car.) In my case, I had a hardwiring kit which would allow me to wire the camera directly to the fuse box (more on that later) which means running a set of wires down the a-pillar to the fuse box.
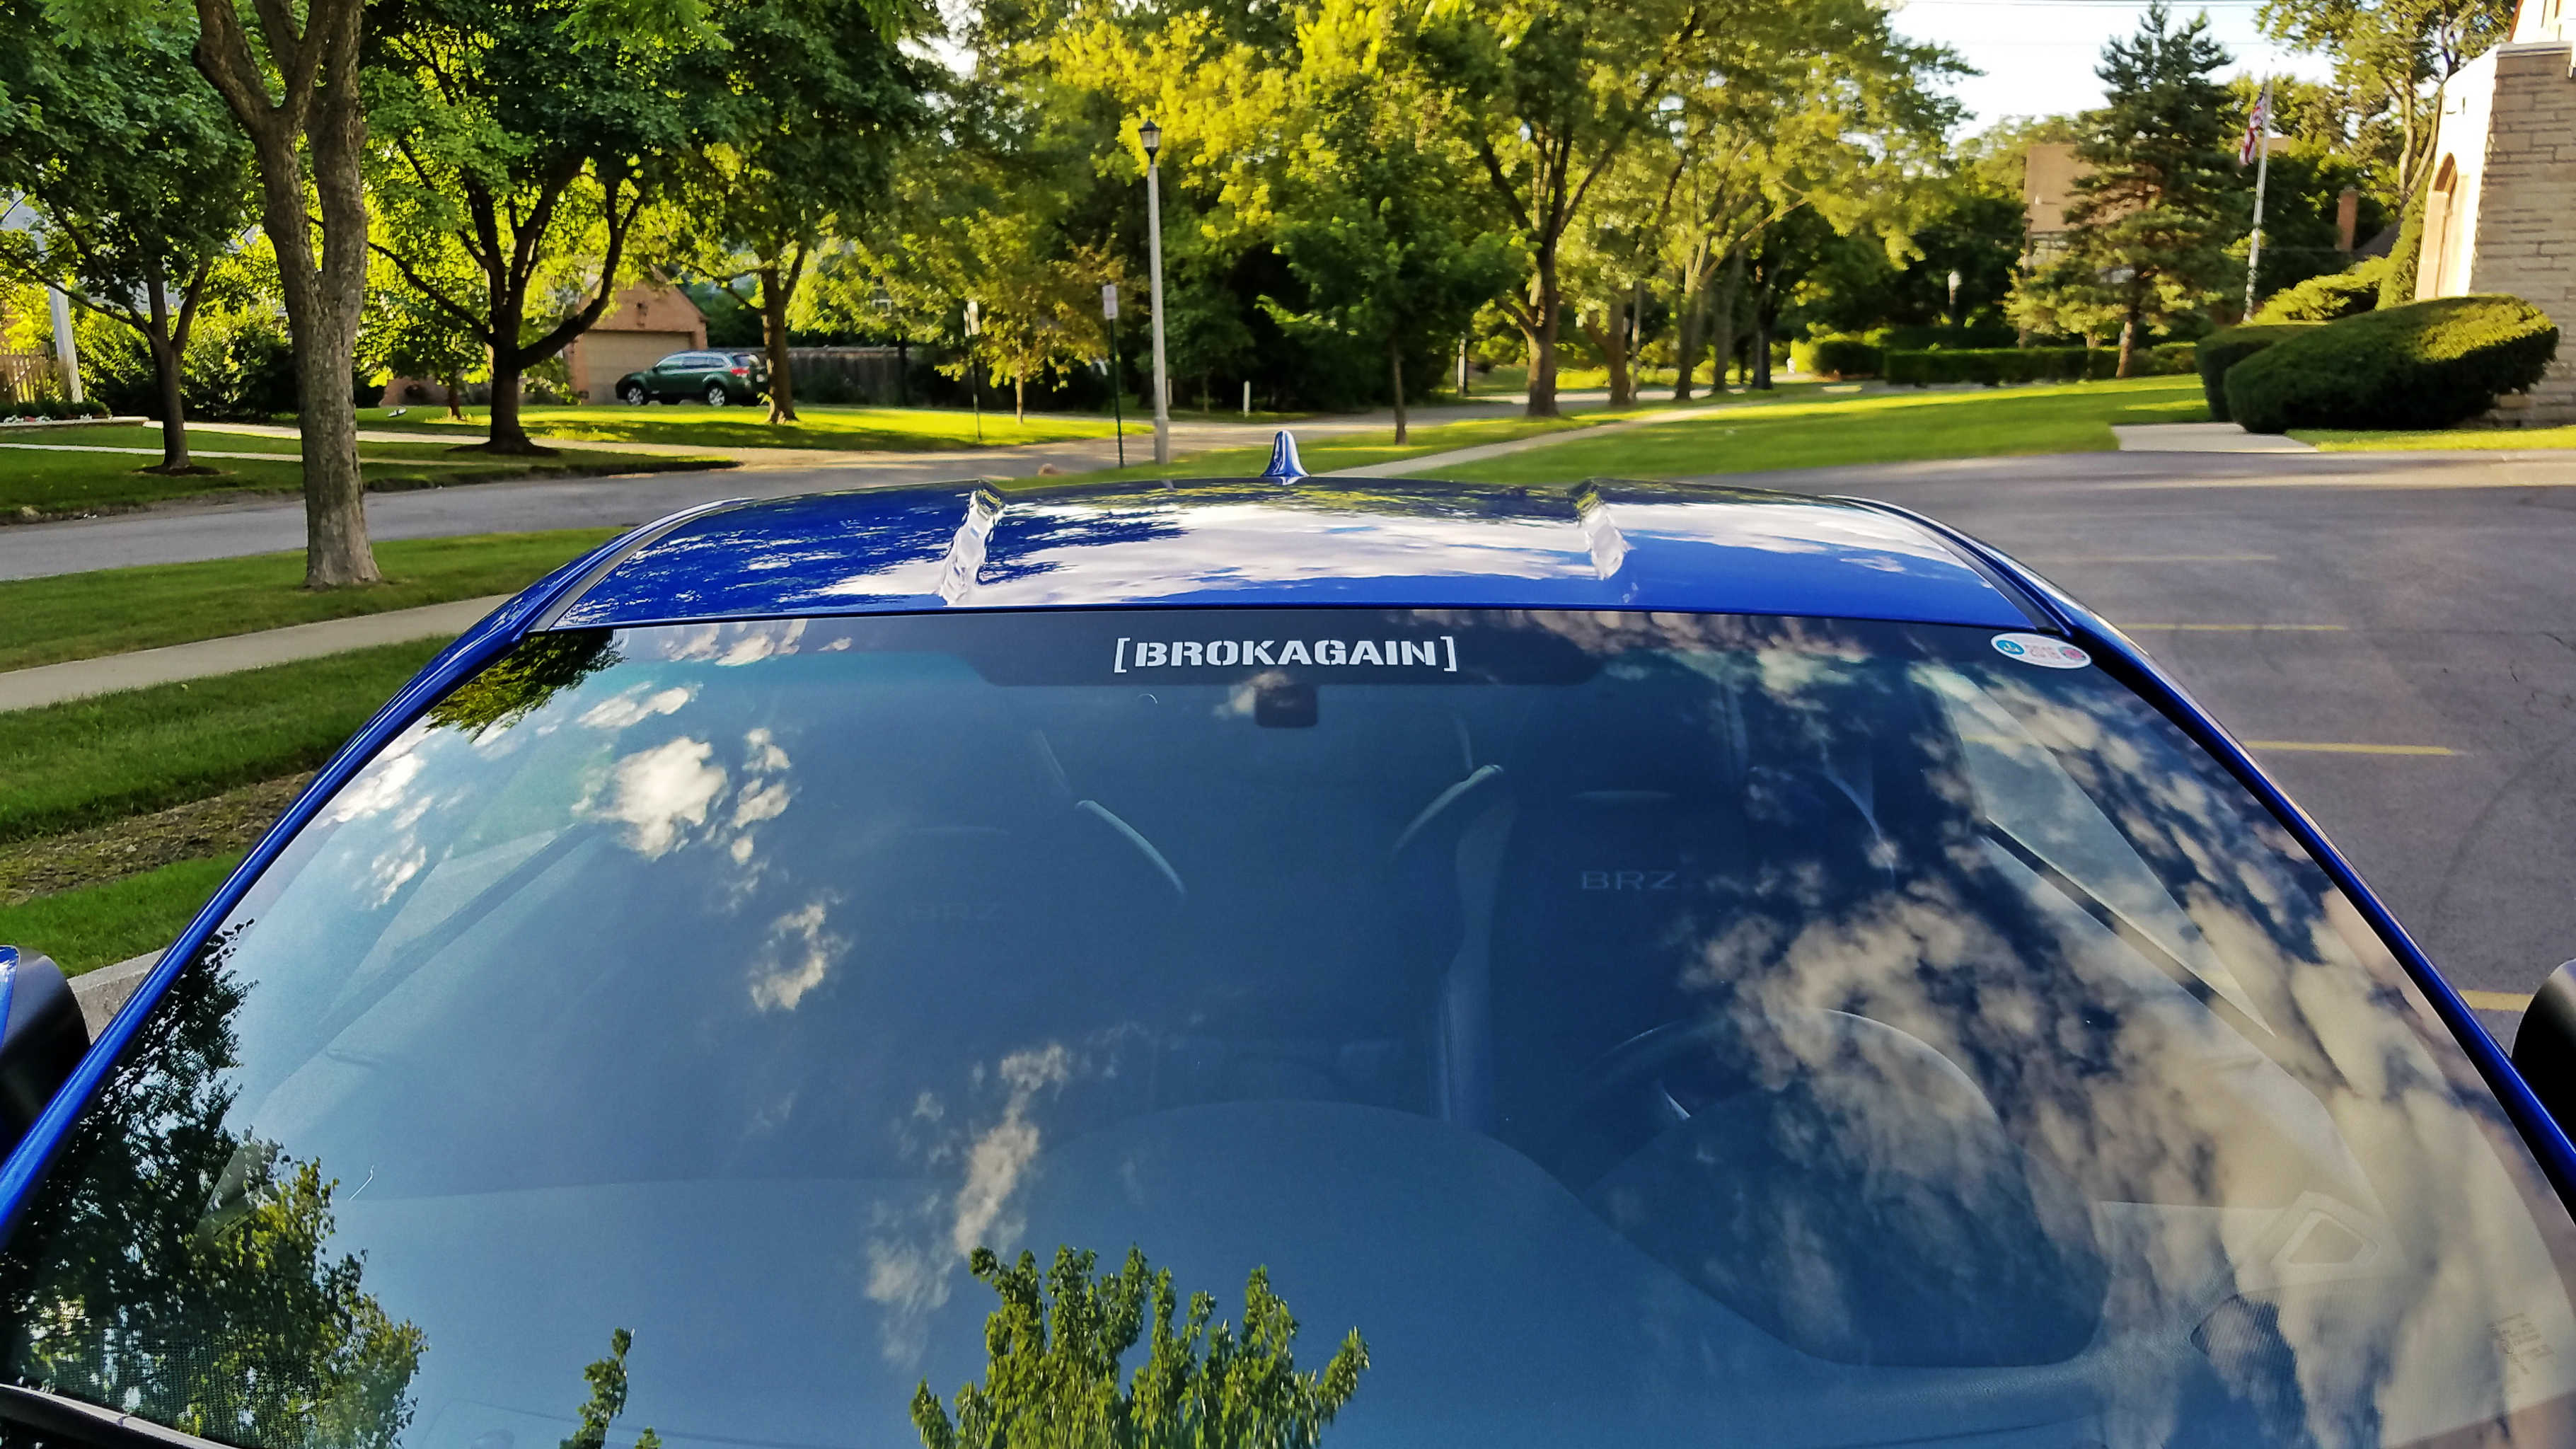
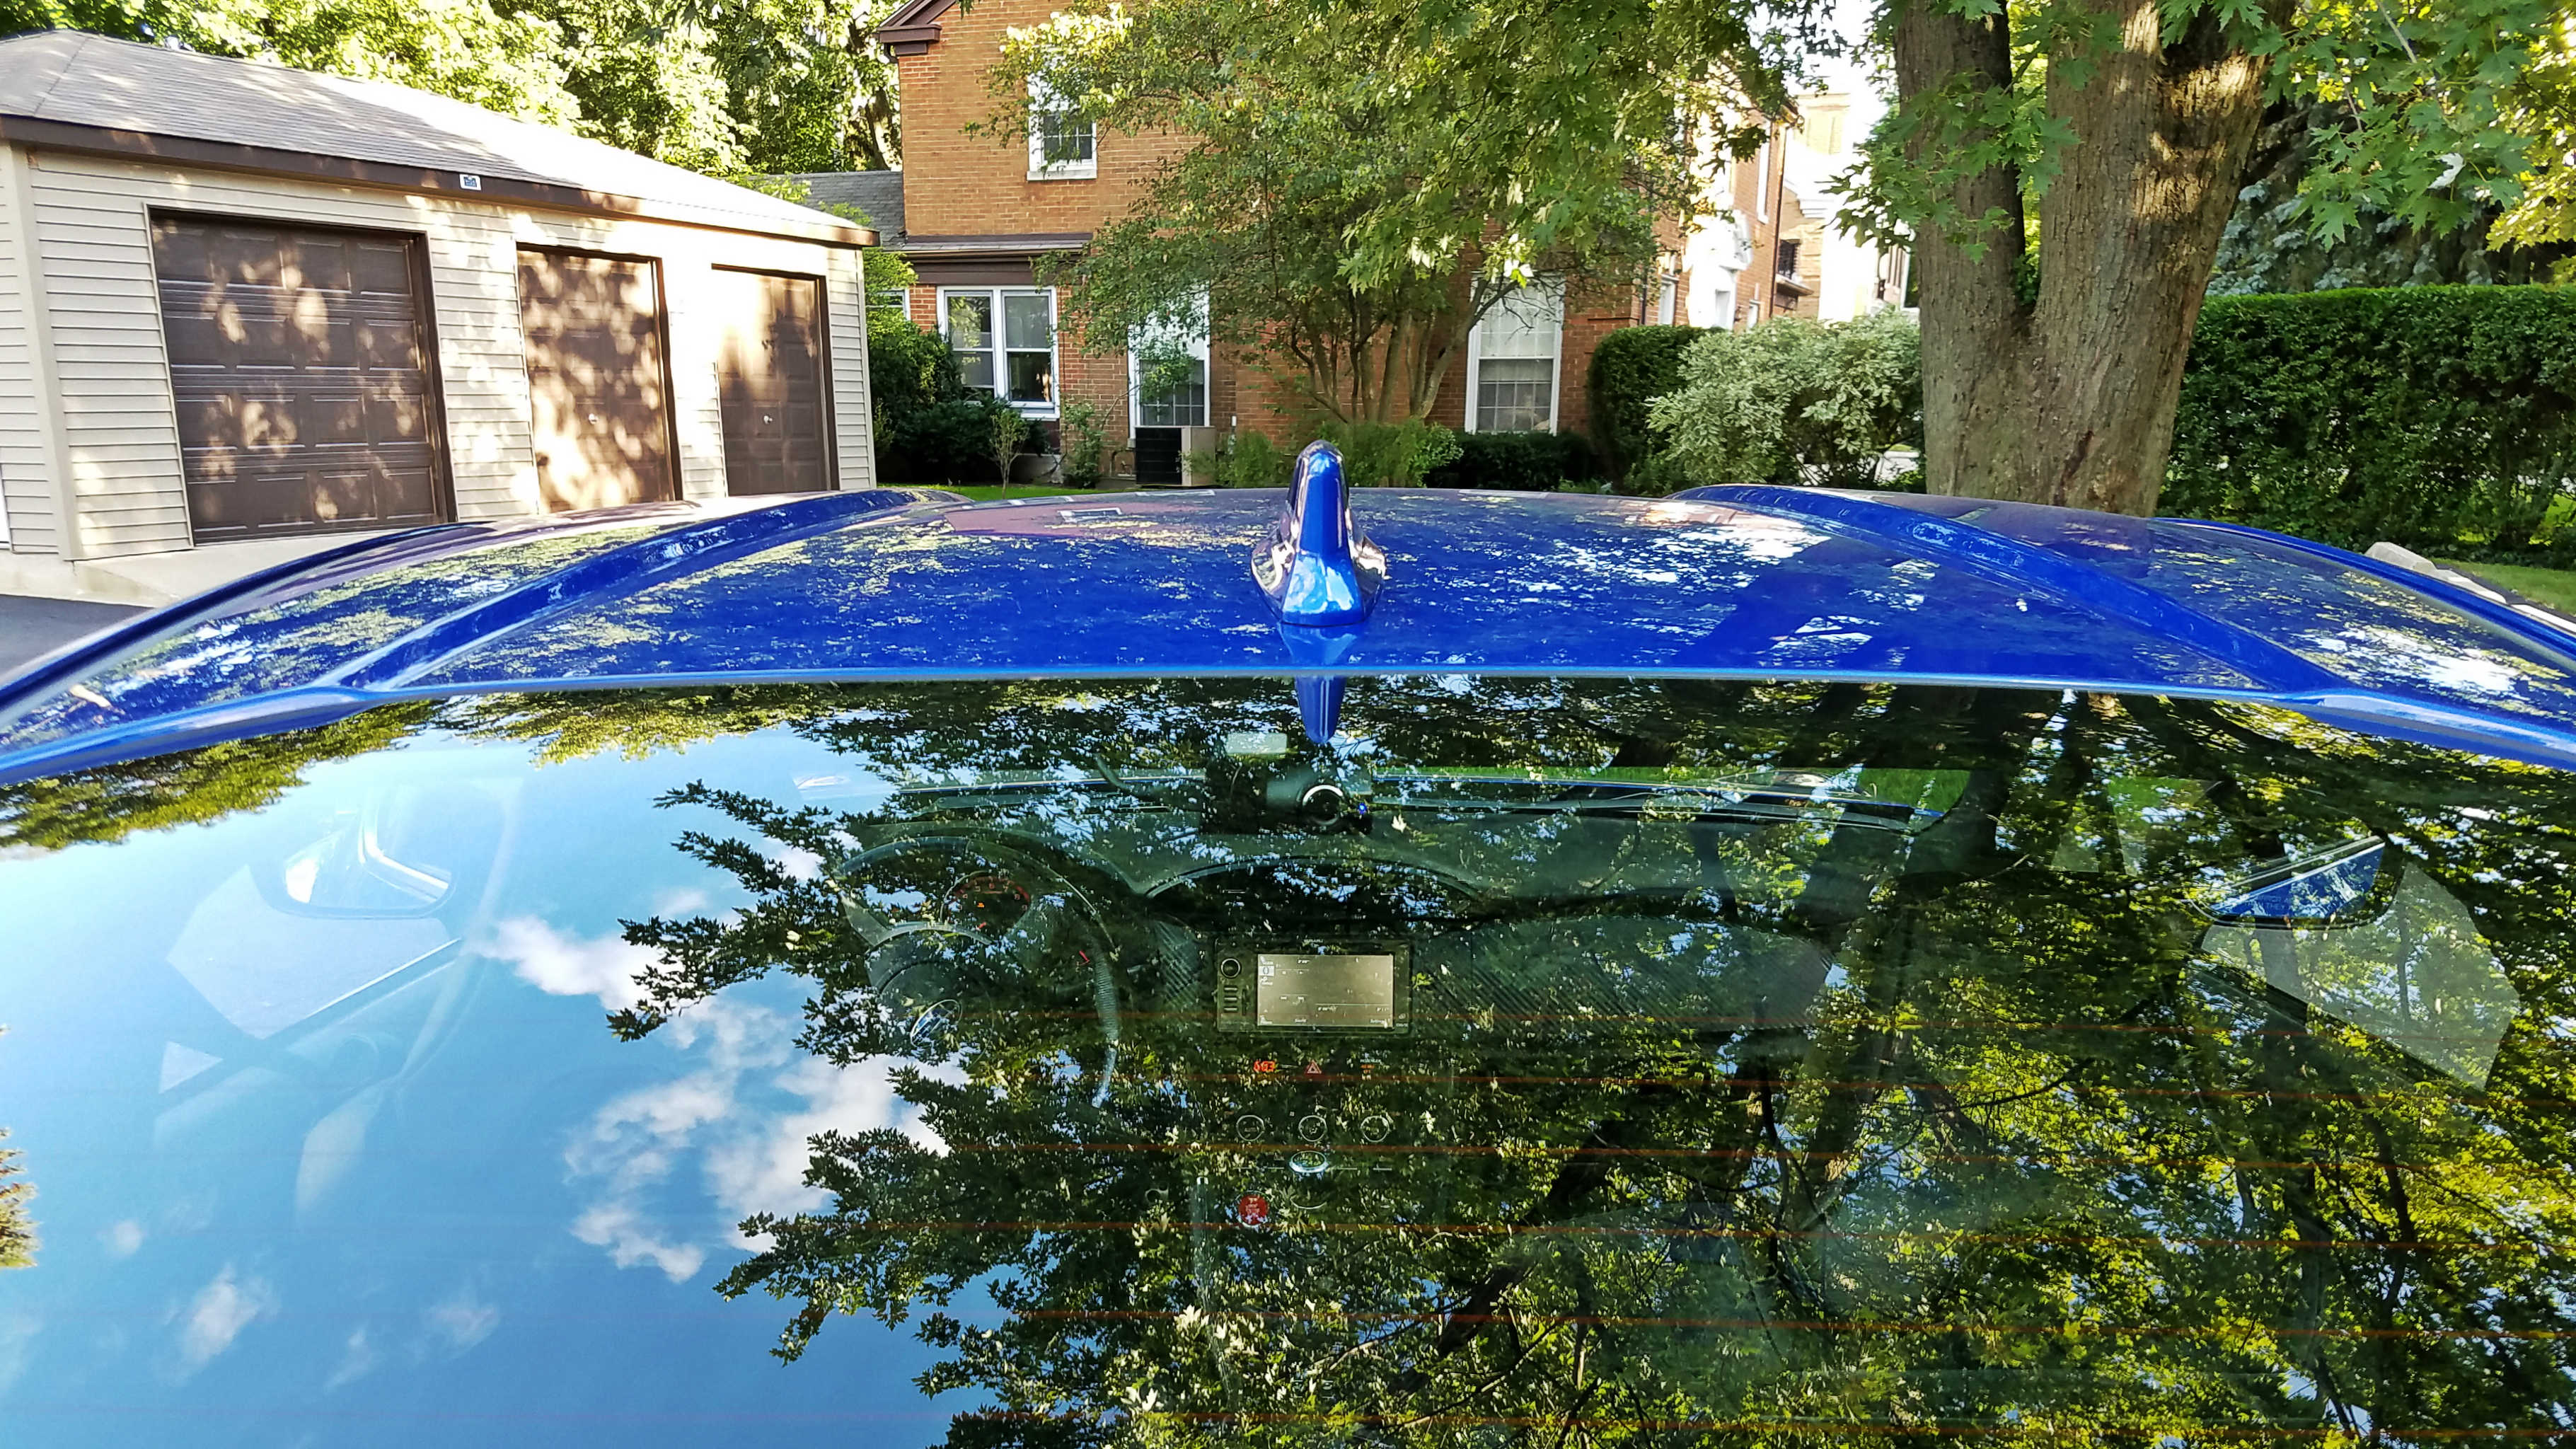
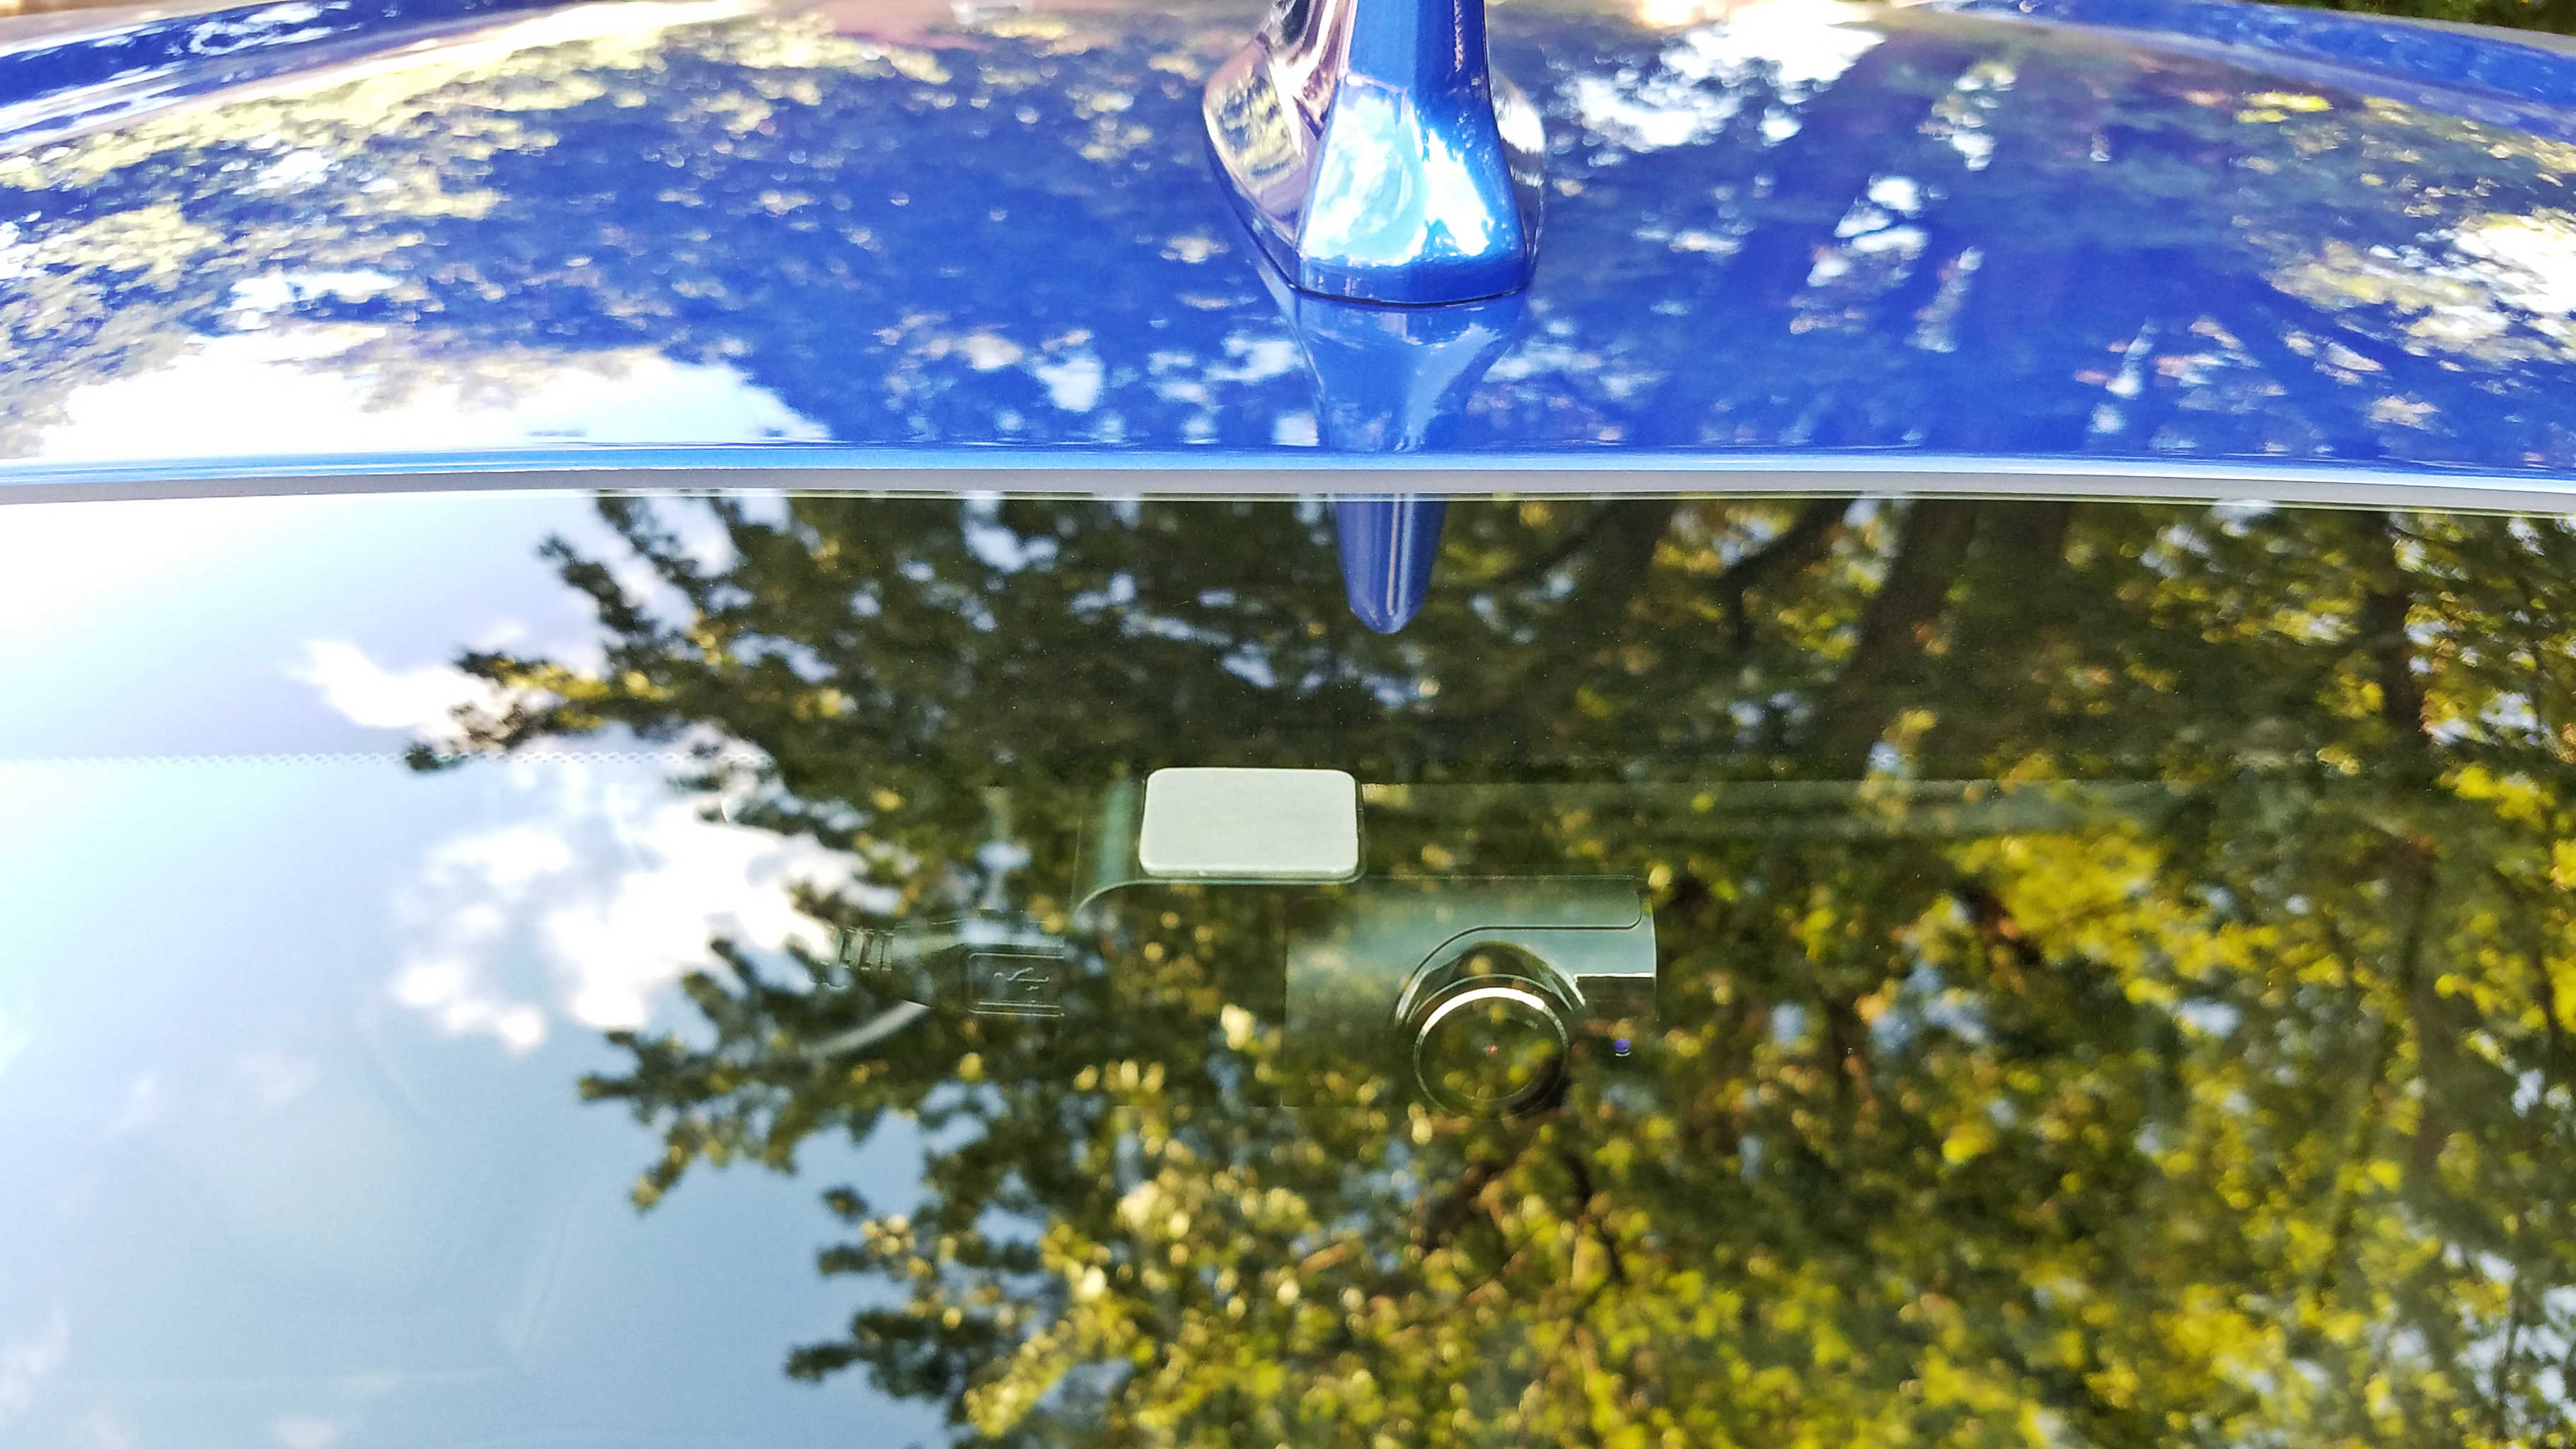
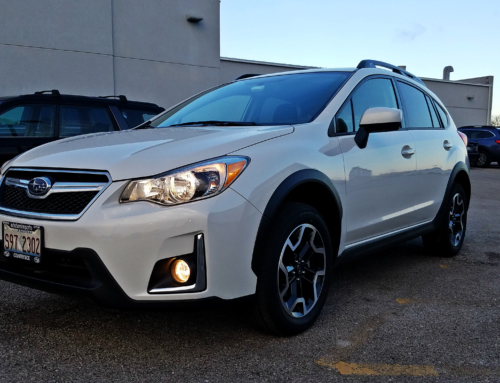
Let’s proceed in order, though. First, I mounted the cameras. For the front camera, I wound up mounting it at the top of the windshield, to the right of the rear-view mirror. I did this for several reasons. First, it didn’t obstruct my vision, as you can see in the images below. From the driver’s point-of-view, the camera is situated behind the rear-view mirror, and not really visible. Second, it sits mostly beneath the shaded, “dot-matrix” portion of the windshield. This not only serves to make the camera less-visible from the outside, but it also helps keep the camera cooler in hot weather by partially shading it from the sun. And yes, I could have mounted the camera so as to put the camera lens slightly-closer to the car’s center-line, but the wide-angle lens started picking up the base of the rear-view mirror mount if I moved it any further to the left. Where it sits, I get an un-obstructed view out of the car, from a slightly off-center position.
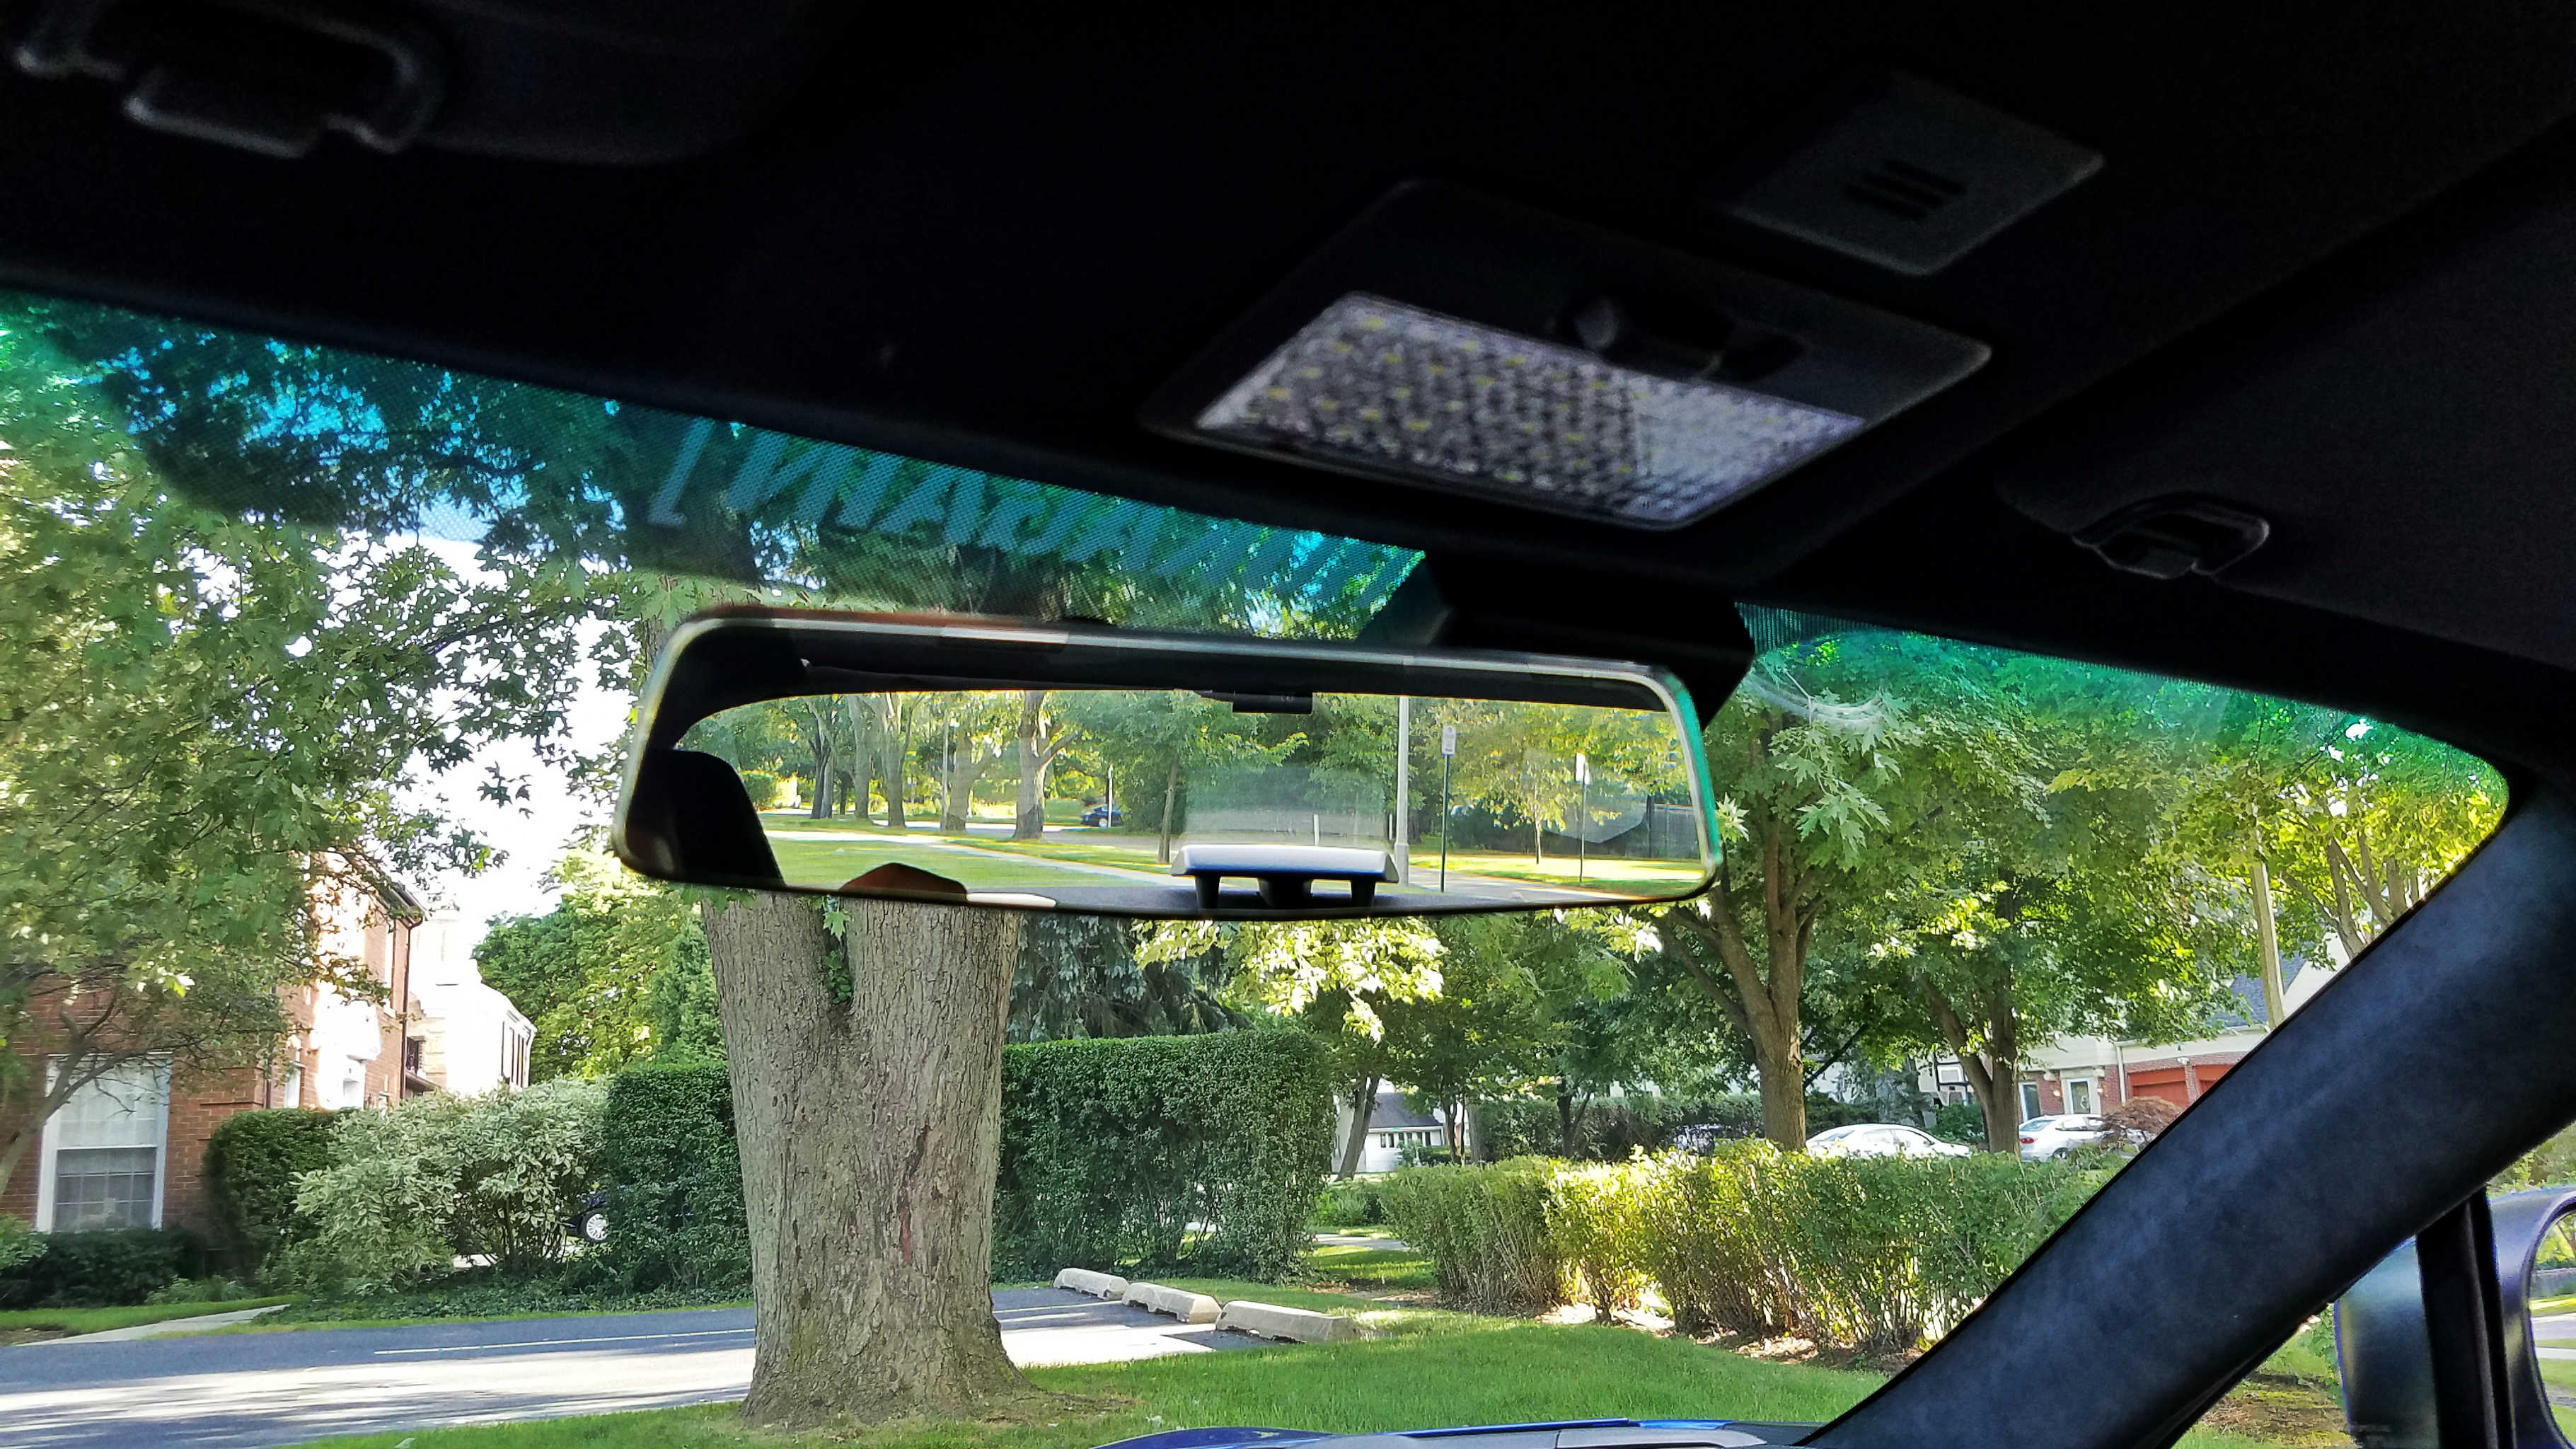
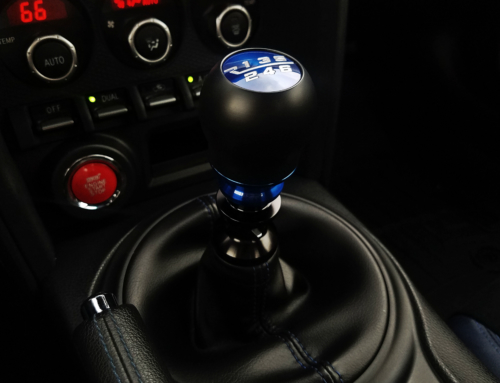
For the rear camera, the only intelligent location to mount it was dead-center, at the top of the rear window. As you can see, it is somewhat visible in the rear-view mirror, but most of the body is blocked by the headliner anyway, so it doesn’t obstruct my view out. Having said that, I don’t like how the adhesive pad for the rear camera is white, rather than black; it makes the camera slightly more obvious from the outside, so I may replace it with a black adhesive pad in the future (the front camera’s adhesive pad is black.) There was room to stick the camera to the black “chalkboard-like” surround at the top of the rear glass, which would have made the camera less-visible, but the adhesive simply refused to stick to that surface. At the very least, this might be a good excuse to get my rear window tinted in order to make the rear camera less visible.
If there is one trend that annoys me with most dashcams these days, it’s the glitzy design they give to some of them. I suppose one mindset would be that a visible dashcam deters people from doing anything stupid, but I’d rather the camera be invisible because a.) I don’t want people to know they are being recorded, and b.) I don’t want it to be something someone breaks into my car to steal. This camera does a better job than most at being relatively “subtle” in its design. The camera housings are all matte black plastic, and there are no bright LEDs. The front camera has two non-obnoxious LED indicator lights on the control side, but they aren’t visible from outside of the car. The rear camera DOES have a blue LED that faces straight out the back that I will need to cover up with either tape or a bit of nail polish or something. Both cameras also have thin, chrome bezels around the camera lens. You can see in the photo of the front camera that without that chrome ring, the camera would be all but invisible from the outside. I will cover these with nail polish too at some point.
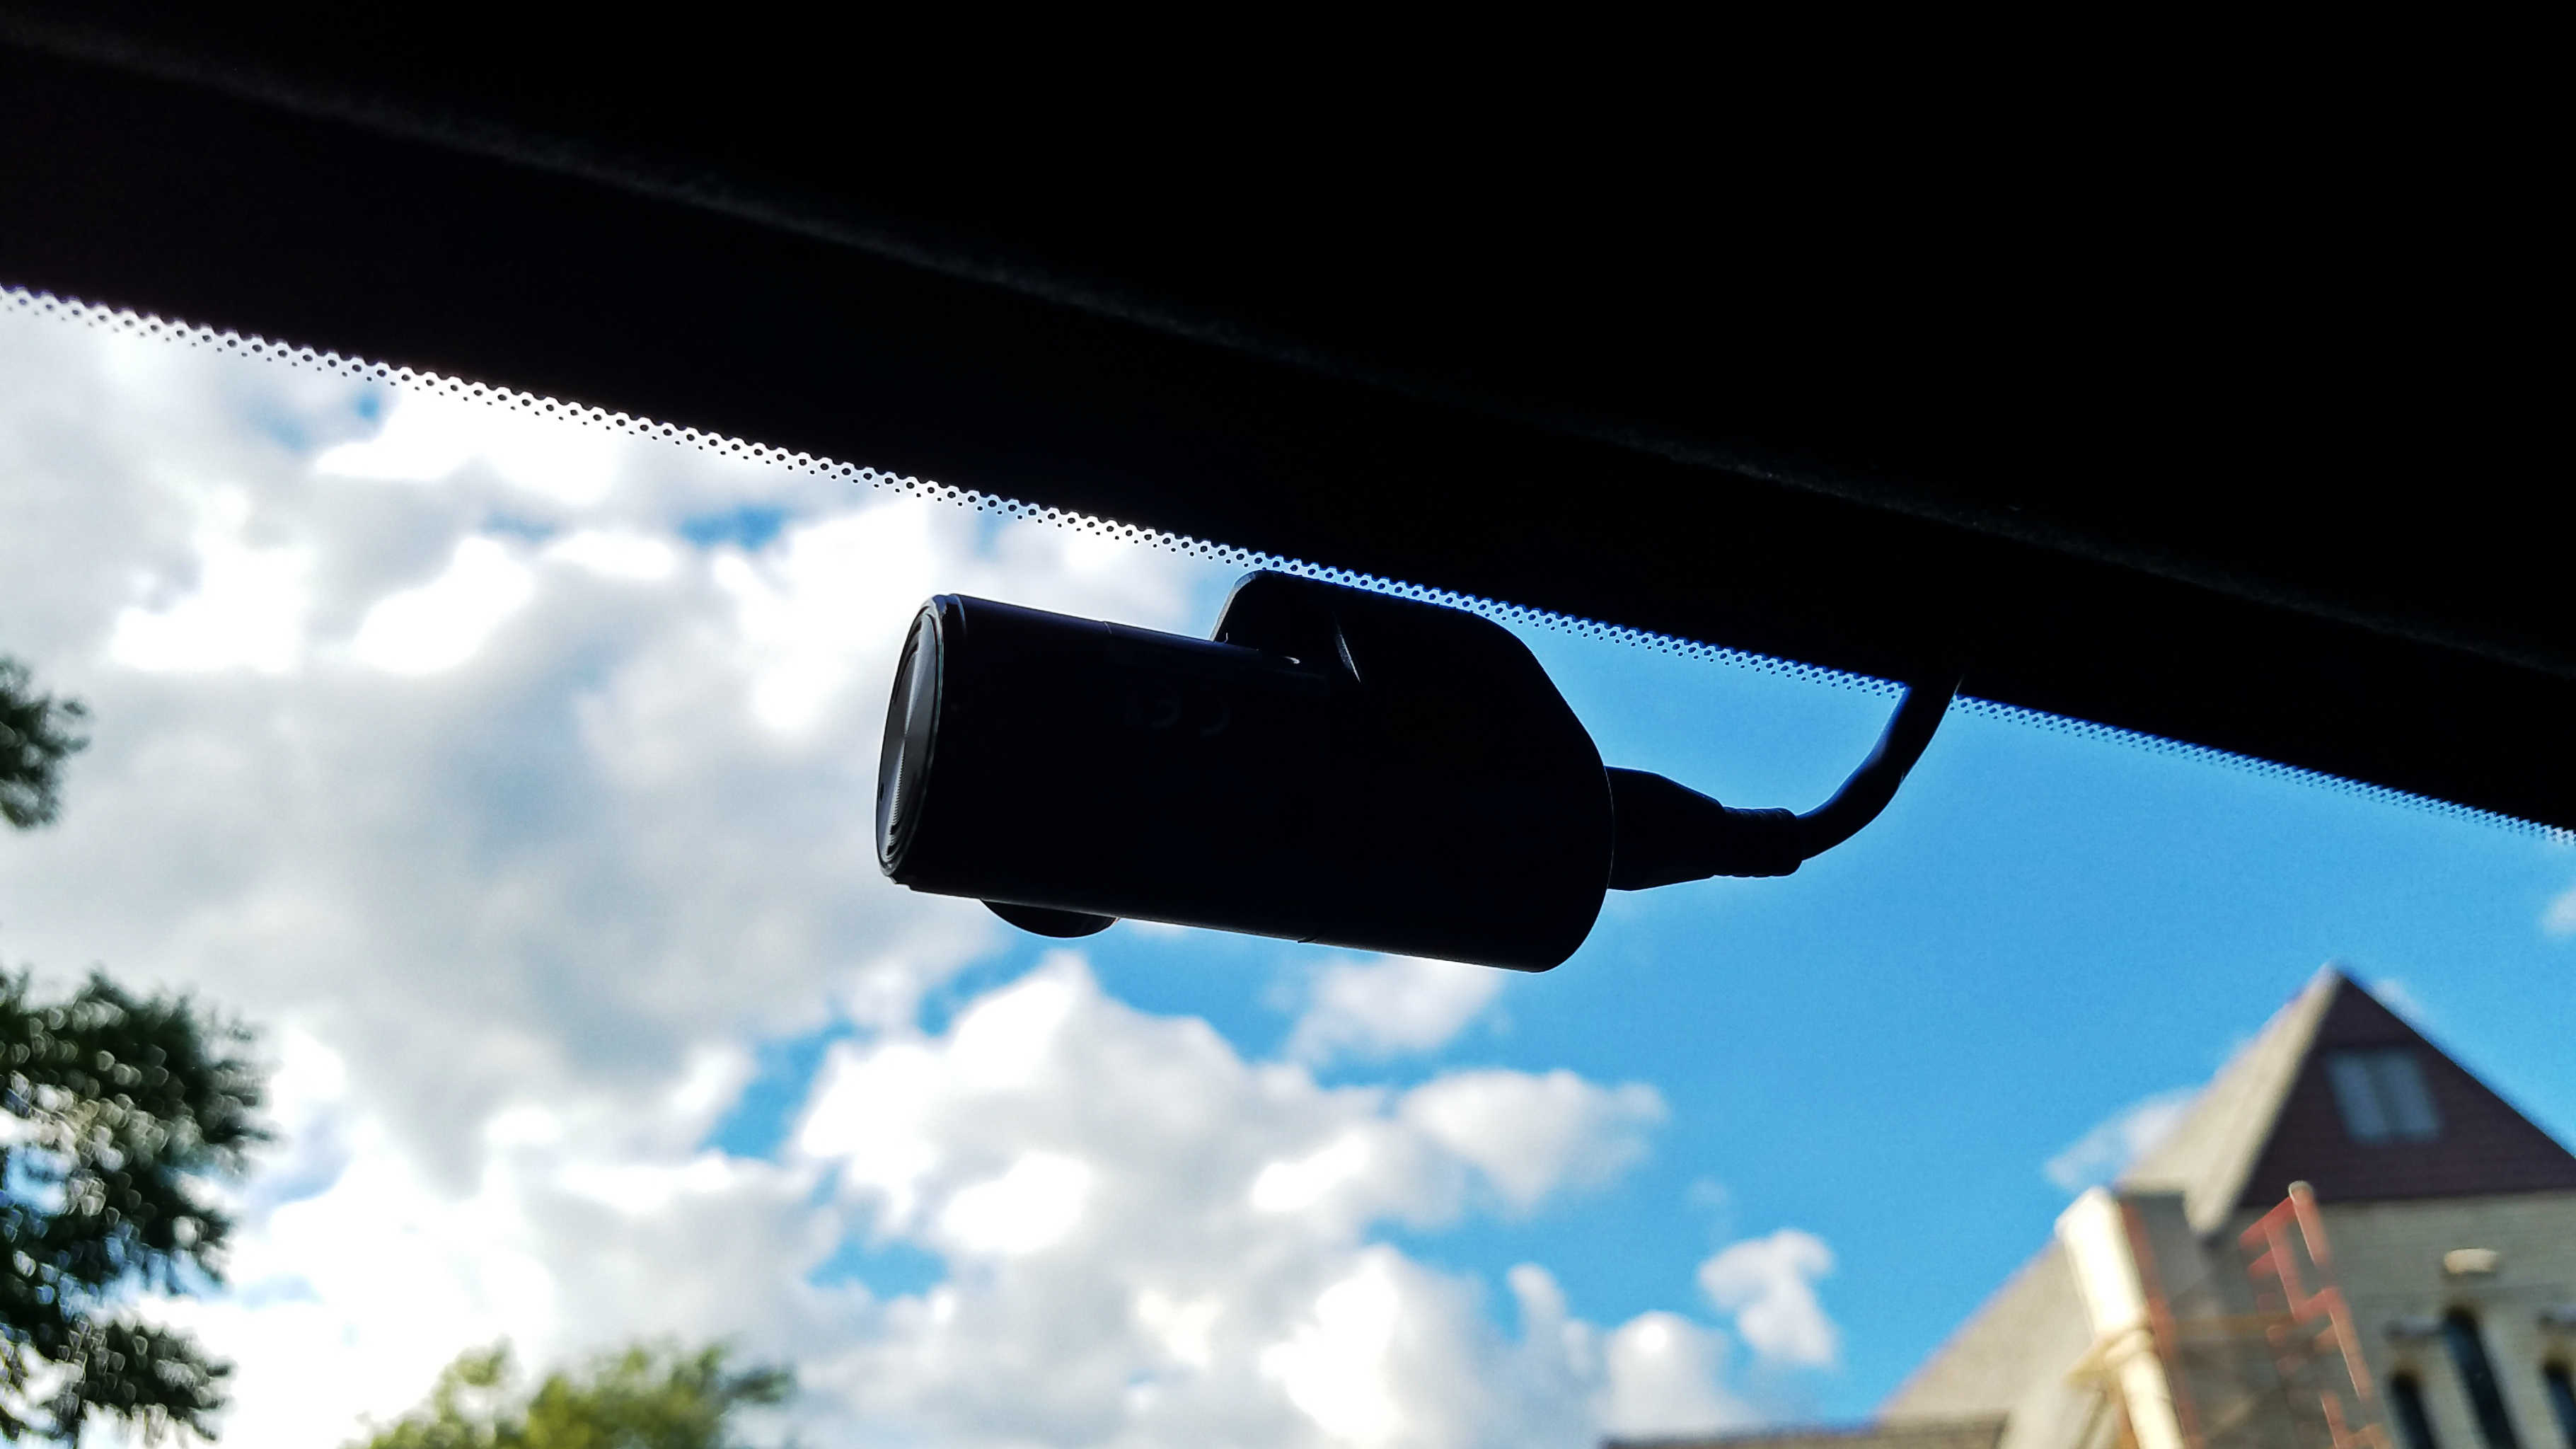
Up-close view of rear camera.
Wiring
Wiring came next. There are two parts to the wiring. The simpler part involves running a USB cable from the front camera to the rear camera. The rear camera requires no separate power lead, so this one cable is the only thing you need to run to the rear of the car. I had originally contemplated dropping the headliner so that I could just run the wire straight back down the middle of the roof, but dropping the headliner is a bit of a pain in the butt, so I opted to tuck the wire under the headliner along the left side of the car, and under the requisite interior panels. The USB cable provided is loooooonnnggg (it needs to be long enough for everything from a Fiat 500 to a Chevy Suburban) so I bundled all of the excess wire and stuffed it under the driver’s side C-pillar.
The more involved part of the wiring involves actually powering the camera. Here you have two options:
- You can use the standard power adapter that plugs into the cigarette lighter outlet in the car. The benefit to this setup is that it is easy, and straightforward.
- You can use the optional “hardwiring kit” to actually wire the camera directly to the fuse box. While this is a little more effort, it is still a relatively simple job. Benefits to this include no visible wires, a free cigarette lighter port, and the camera being able to run off of your car’s battery when the ignition is turned off (parking mode.)
I opted to hardwire the camera. The hardwiring kit really has two components. First is the wiring harness. This plugs into the camera, and has a single, sheathed set of wires that has plenty of length to run them down to the fuse box of your vehicle. In my case, I ran it along the front of my headliner to the left a-pillar. From there, I pulled the a-pillar trim piece off, and ran the wire down the length of the a-pillar to the dash. Then I snaked it straight down through the dash and fished it out from underneath, as my fuse box is right there on the very left side (as with most vehicles). This entire process only took a few minutes, and was fairly straightforward, leading to a completely invisible wiring run.
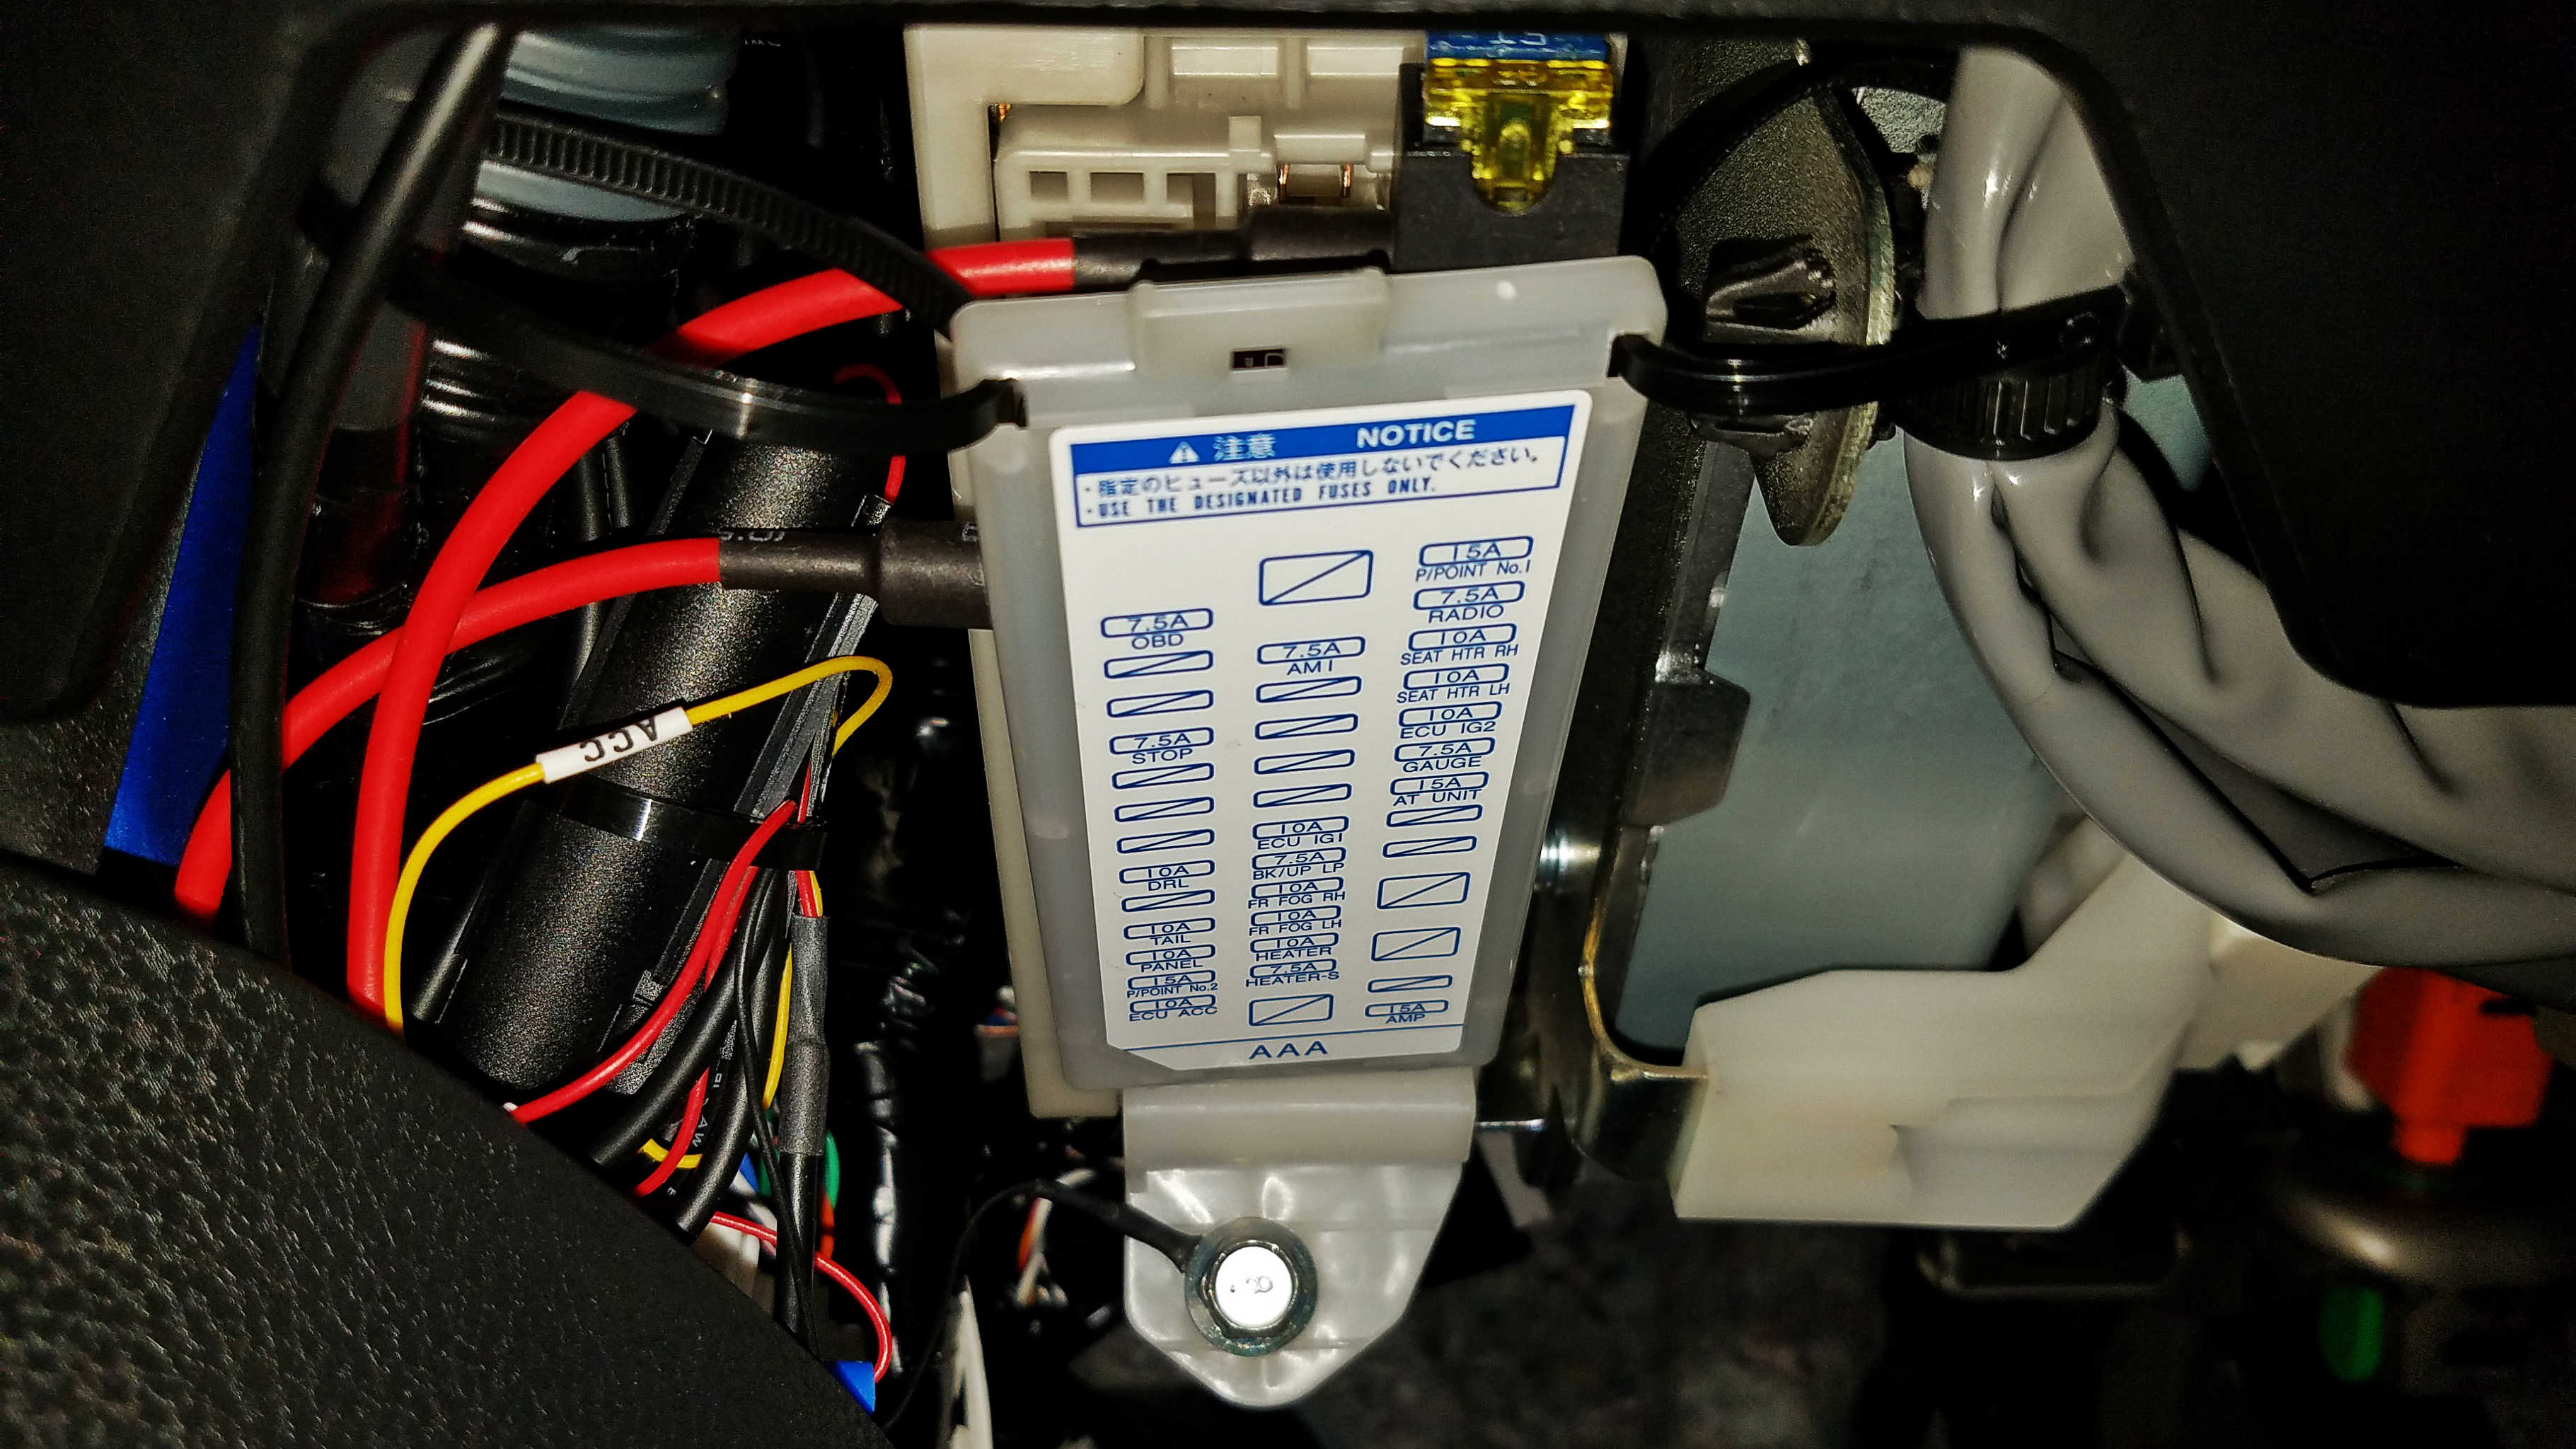
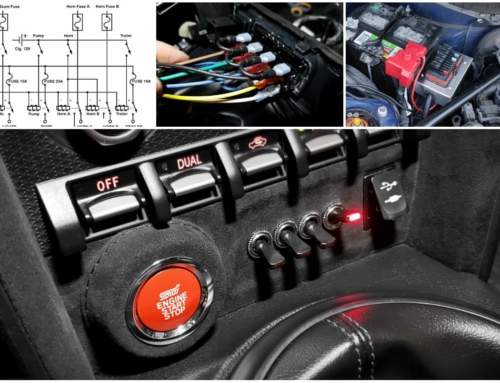
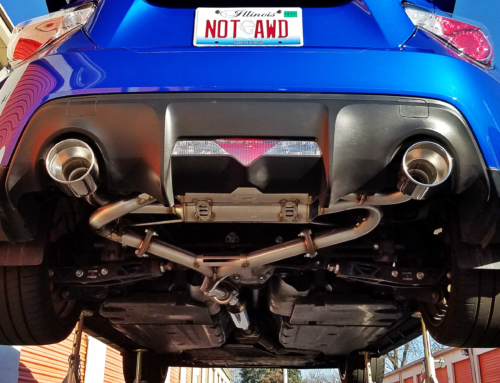
The end of the wiring harness branches off to three separate leads. A ground, a switched +12V lead, and a constant +12V lead. To connect the ground, I simply loosened the bolt securing the bottom of the fuse box, and slotted the ground wire in behind it before retightening it. Any grounded bolt would work, but this bolt actually serves as the ground for the fuse box itself, so it seemed ideal. You can see that wire and bolt in the photo of the fuse box further below.
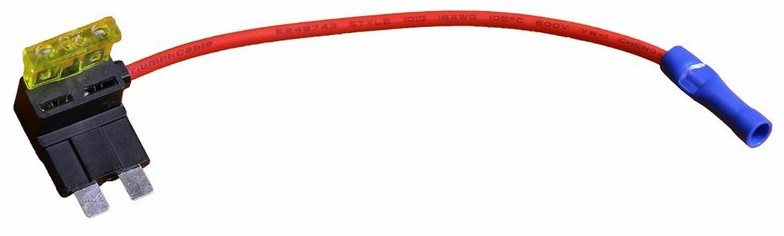
To connect the two 12V leads, I used two add-a-fuse adapters. These are ingenious little devices that allow you to piggy-back a separate circuit out of any fuse in your fuse box (with the use of a second, independent fuse) cleanly, without any permanent wiring, and without the old-fashioned method of jamming wires into the fuse box alongside an existing fuse. Basically you remove the existing fuse from your fuse box. You place that fuse into the first slot in the add-a-fuse adapter, then you add the second fuse for whatever accessory you are powering. Then you plug the add-a-fuse adapter into the original slot in the fuse box. It’s super easy!
For this car, I opted to use the 7.5A STOP fuse for my constant +12V source (the fuse for the tail lights; 4th down in the left column), and then used the 15A P/POINT No. 1 fuse for my switched power (the fuse for the cigarette lighter; top fuse in the right column). While the add-a-fuse adapters made for a “clean,” easily-reversible installation, they do protrude further out, which means replacing the cover isn’t possible. As you can see from my photo, I used zip-ties to secure the cover up top (it is still hooked in at the bottom so I can easily remove it if I need to check fuses.)
Configuration and Use
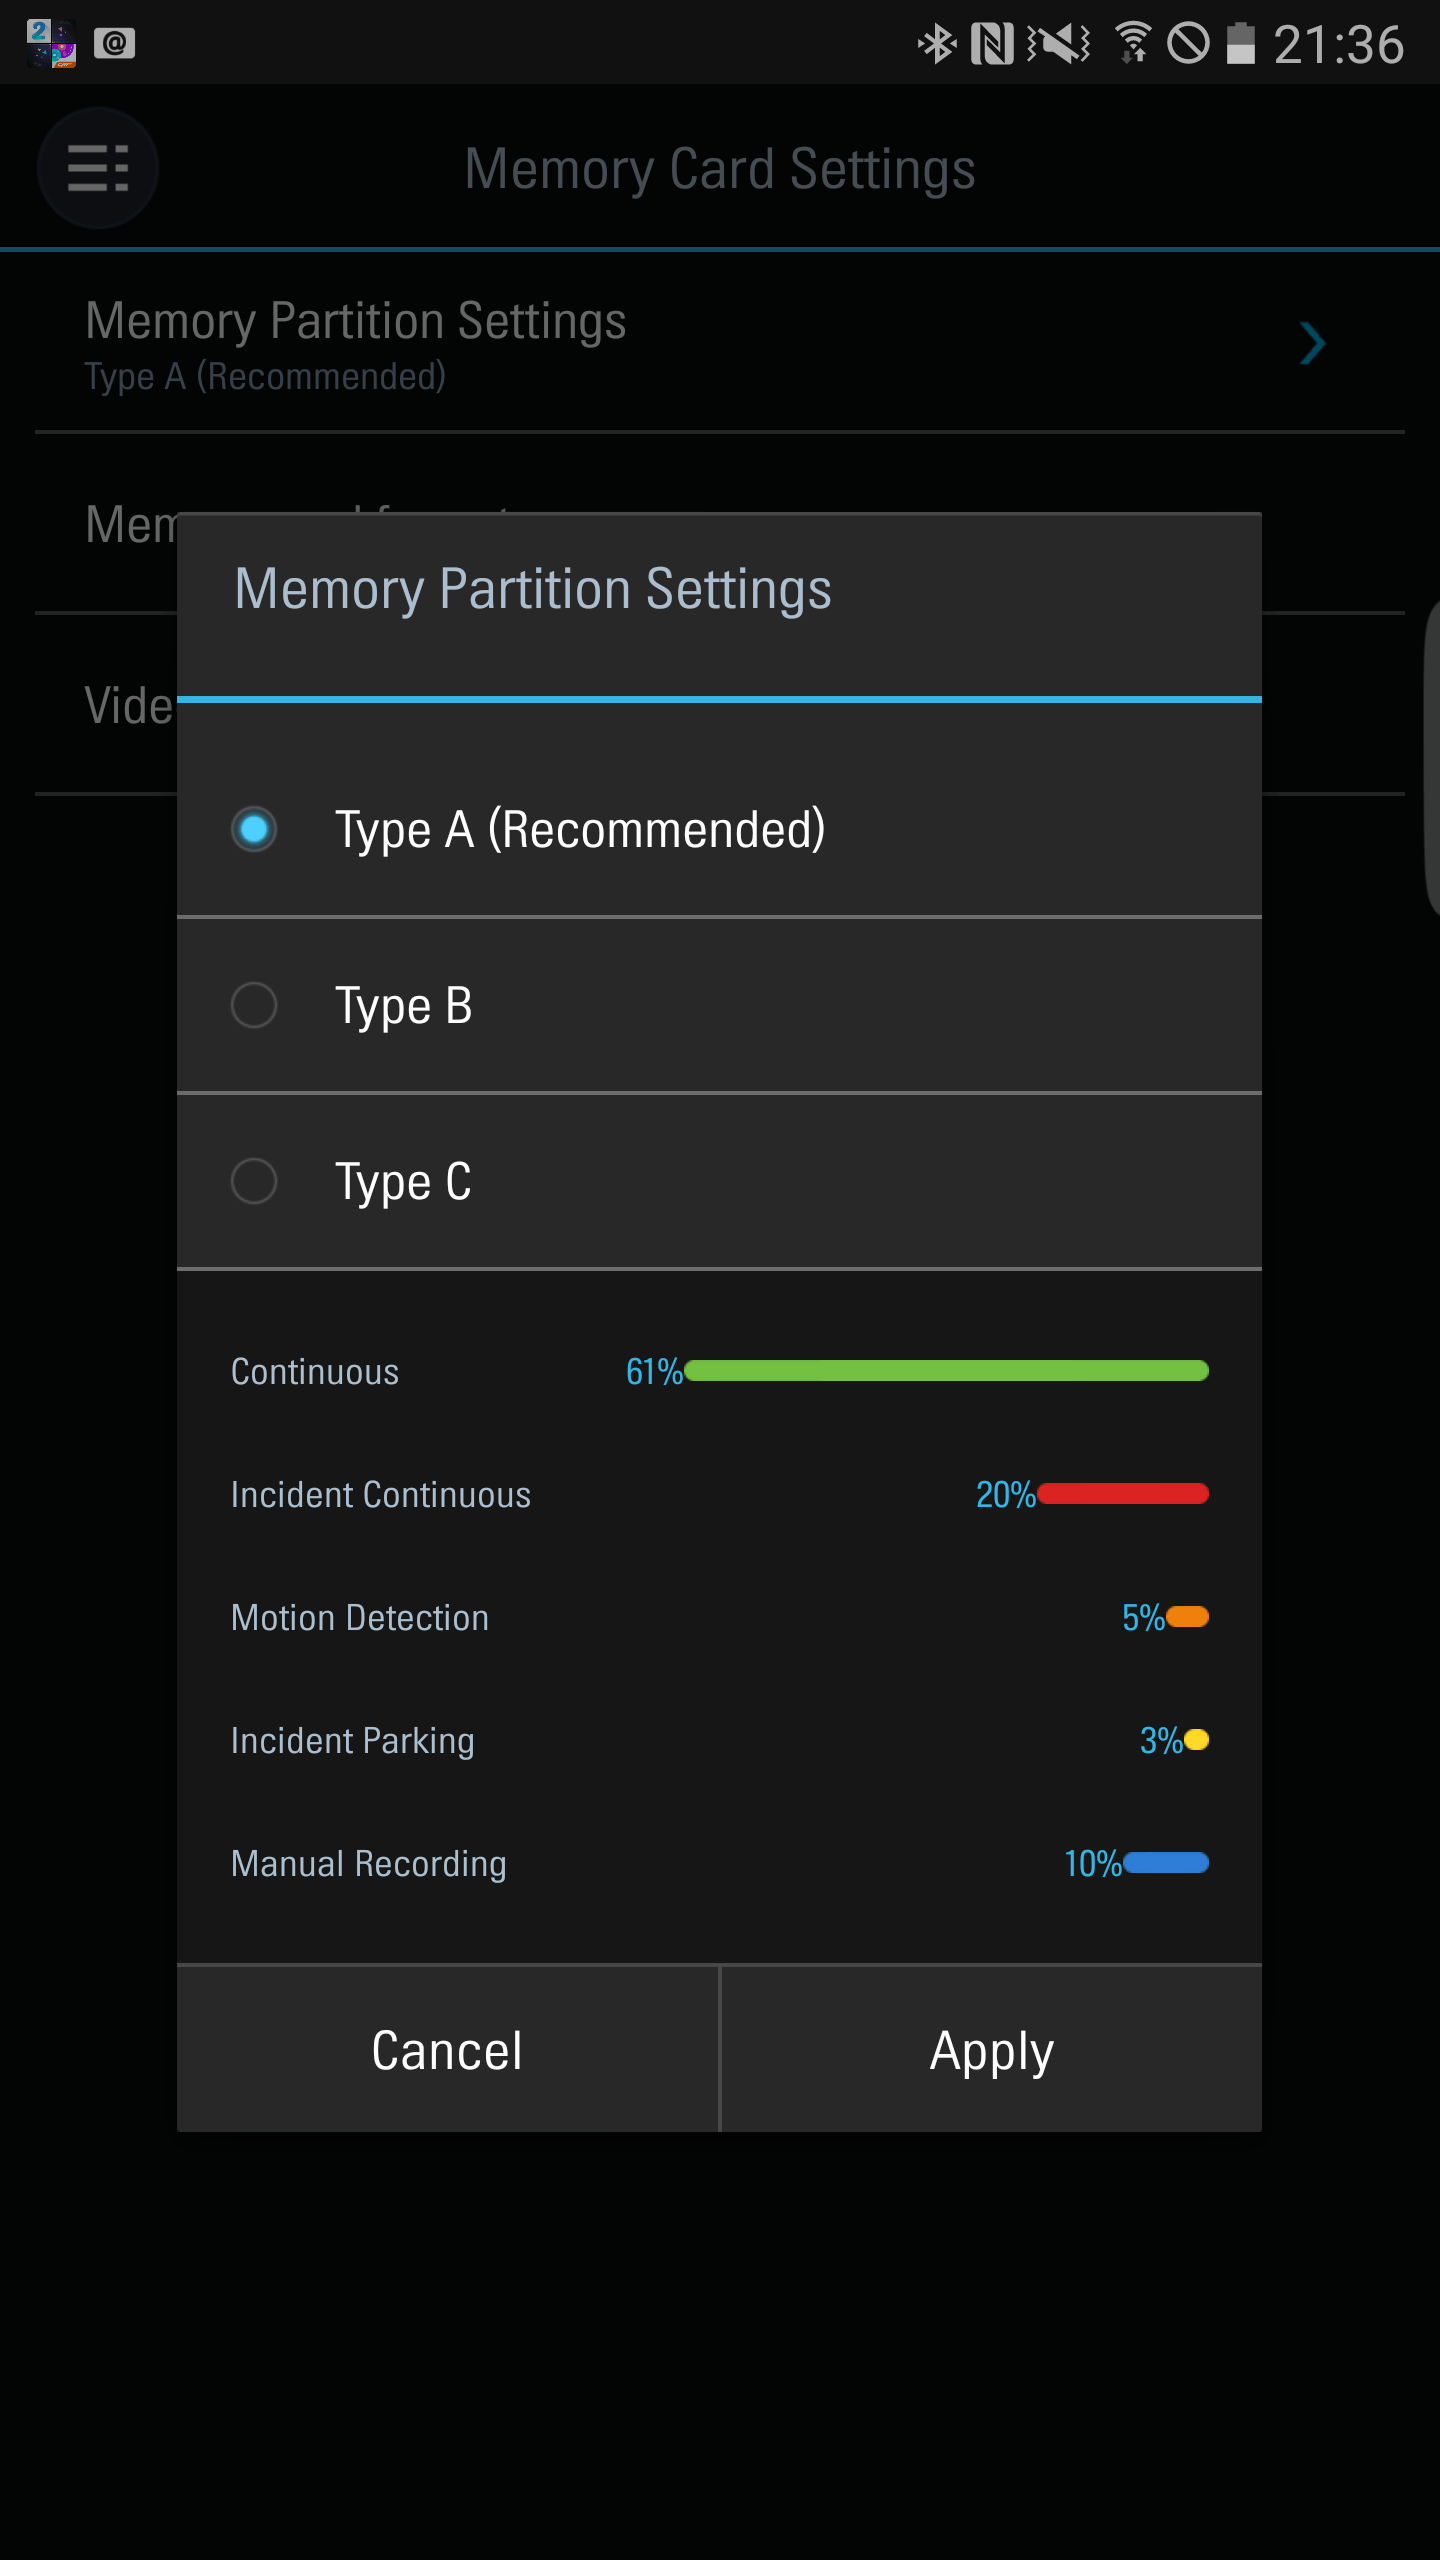
So this camera offers a lot of configuration options, and I haven’t necessarily played with all of them yet, but I’ll try to explain some of the more interesting features. To start with, though, let me explain how it normally operates. When I start my car, the camera receives 12V from the switched power lead. This tells the camera to go into driving mode. Within a few seconds of starting the car, the camera audibly makes two announcements (this can be adjusted or disabled). The first announcement tells me how many “events” it recorded while parked. The second announcement simply states that the camera is entering driving mode and will begin recording. As I drive, the camera continuously records from both the front and rear camera.
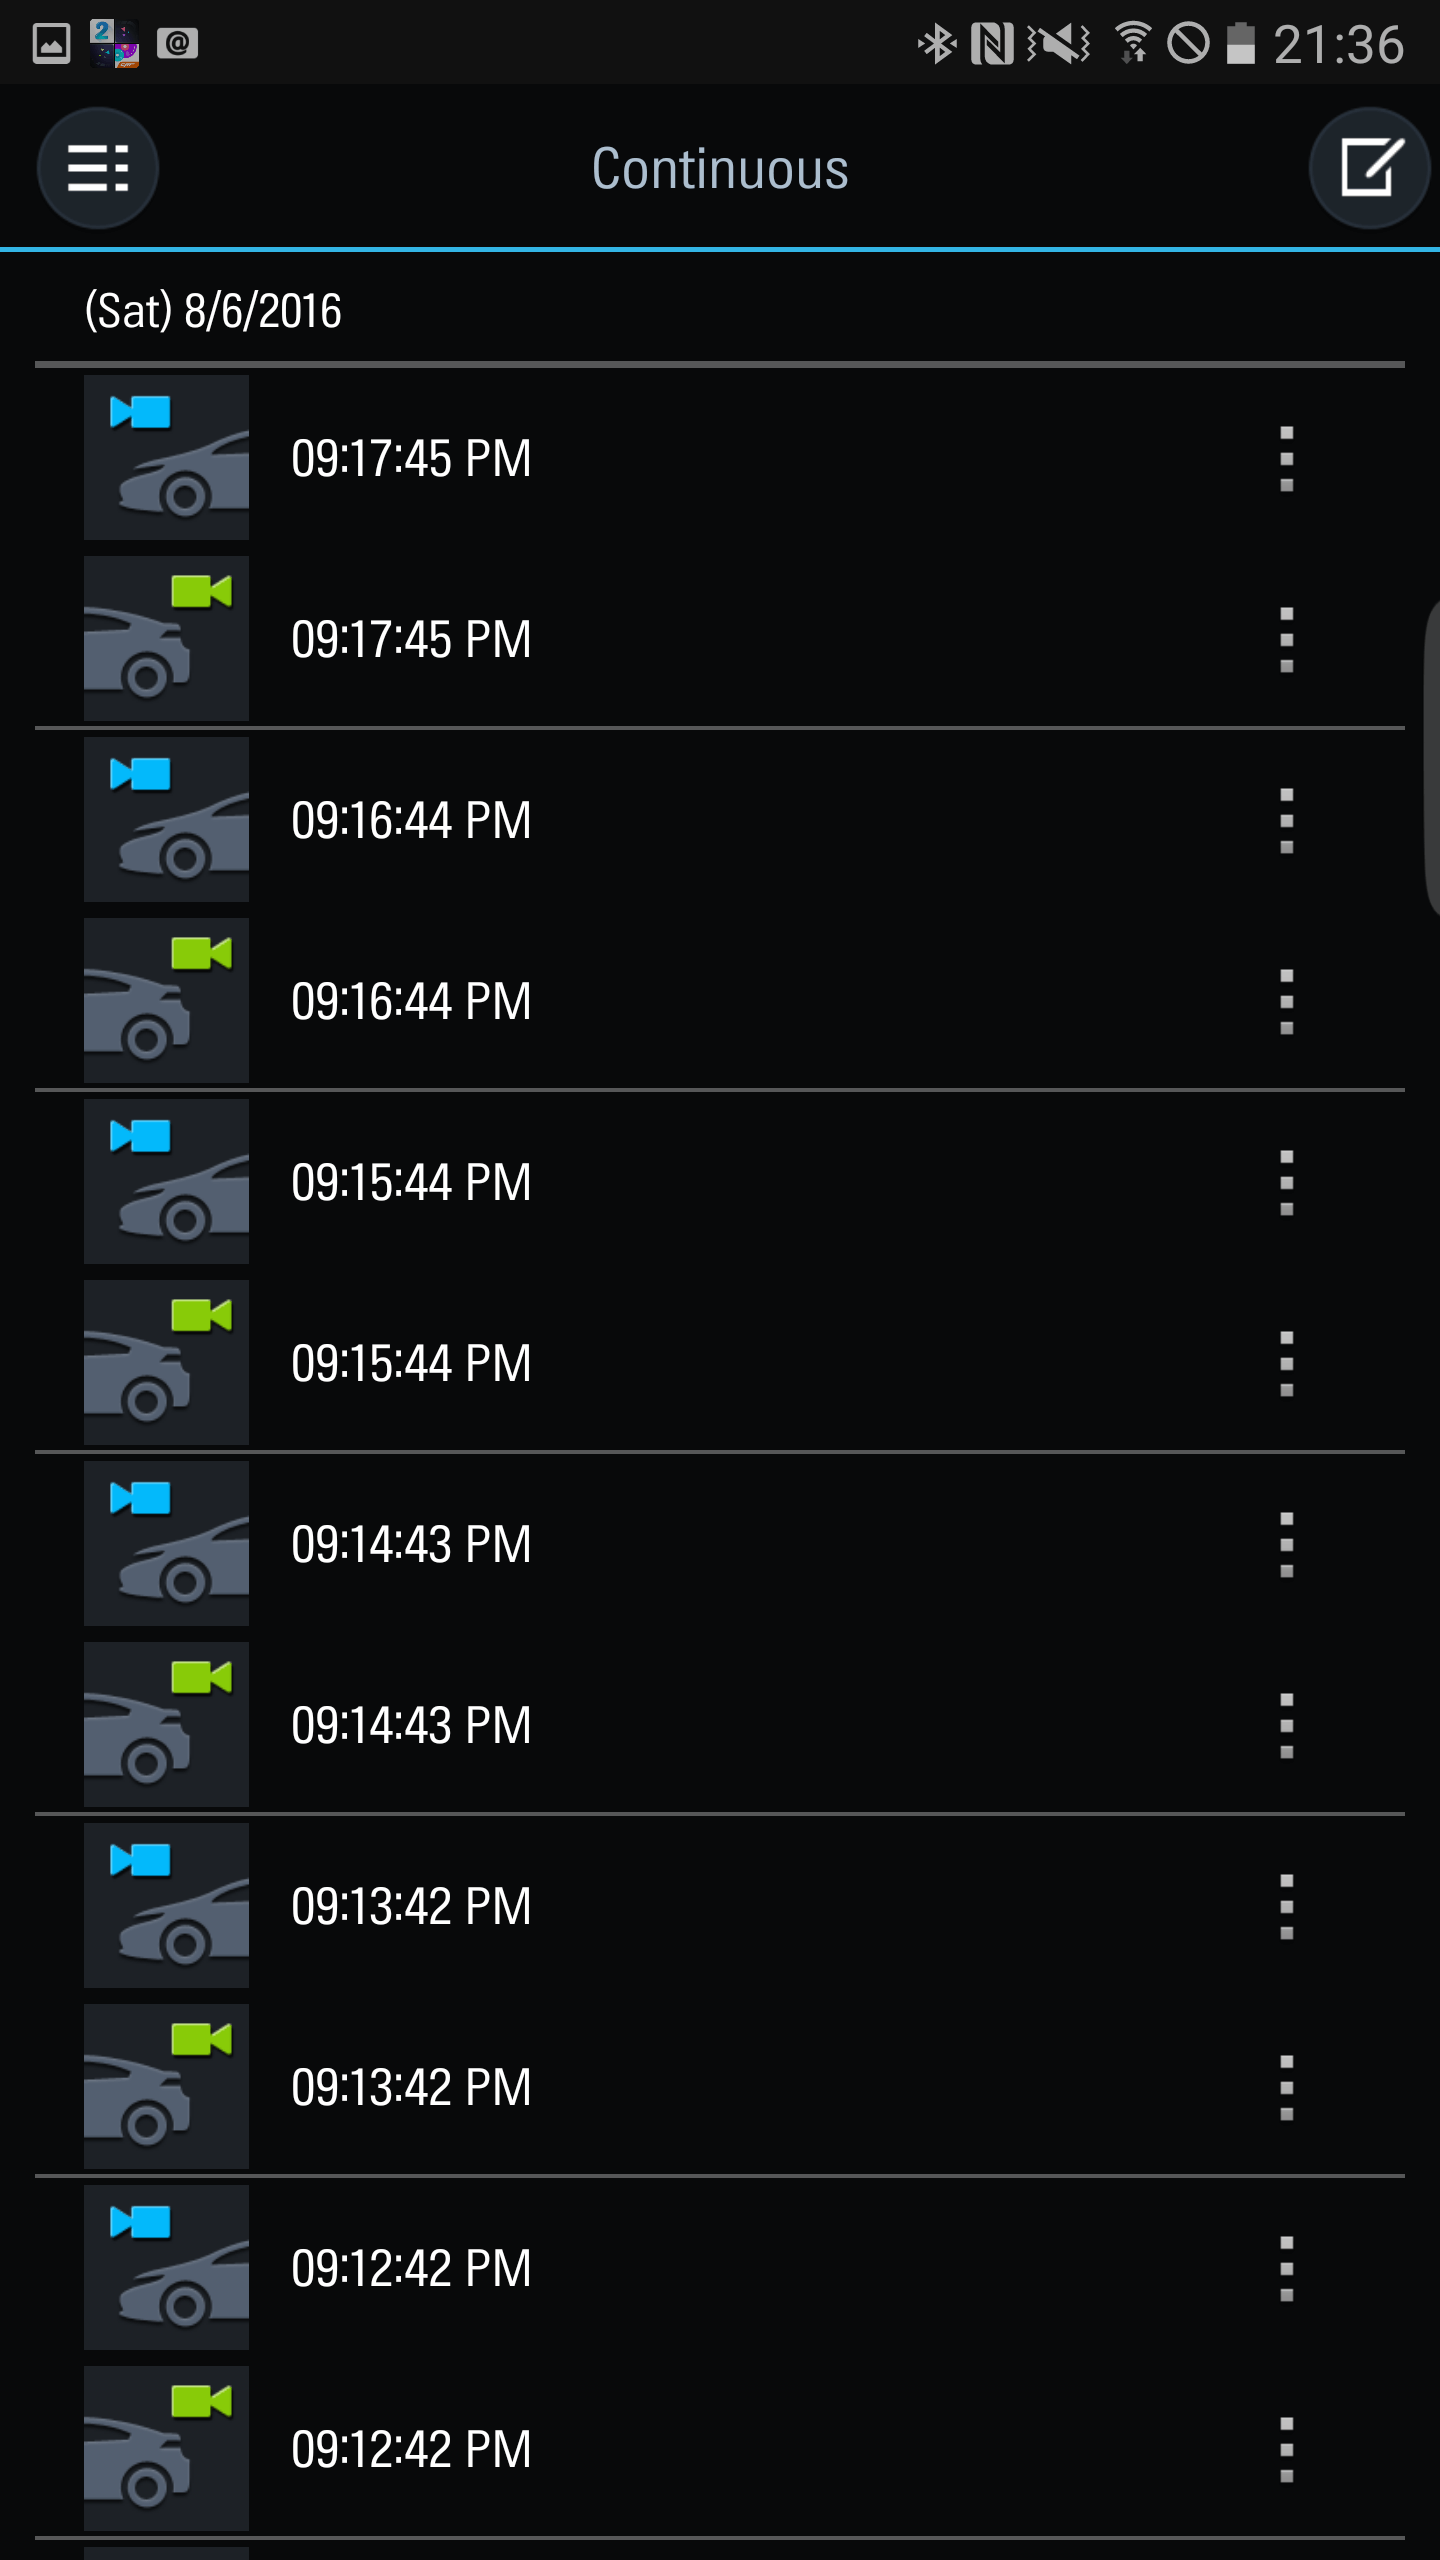
Recorded clips are each stored as separate, full-HD files, that are time/date stamped and display the vehicle speed as well (all of this data coming from GPS.) The files are stored as 1-minute clips, and the camera will simply record over the oldest clip once the memory card is full. Note that the front and rear images are not superimposed on each other. They are saved as entirely independent, full-HD files. If the camera detects an impact while driving (the sensitivity is adjustable), it emits an audible beep, and stores several seconds before and after the event as a separate clip in a separate folder, both on the SD card and in its internal memory, just in case the SD card gets damaged or corrupted. This prevents that potentially important clip from being overwritten by more driving footage.
When I turn off the car, the device waits about thirty seconds, then announces that it is entering parking mode. There are two parking modes to choose from: continuous or time-lapse. I chose time-lapse, which takes one photo every second (this won’t drain the battery as quickly as continuous mode). In this mode, the impact sensitivity is much higher in order to detect things like parking lot fender-benders and what not, and if it detects an impact, it again records that segment separately. In order to prevent from draining your car battery, you can specify both a timer shutoff, and a voltage shutoff. I have it set to stop recording after 12 hours, or if the battery drops below 12.3V, whichever comes first. I think 12 hours is conservative, and I might increase that limit depending on what I see in the voltage readings on the clips (the battery voltage is also stamped on the clip.)
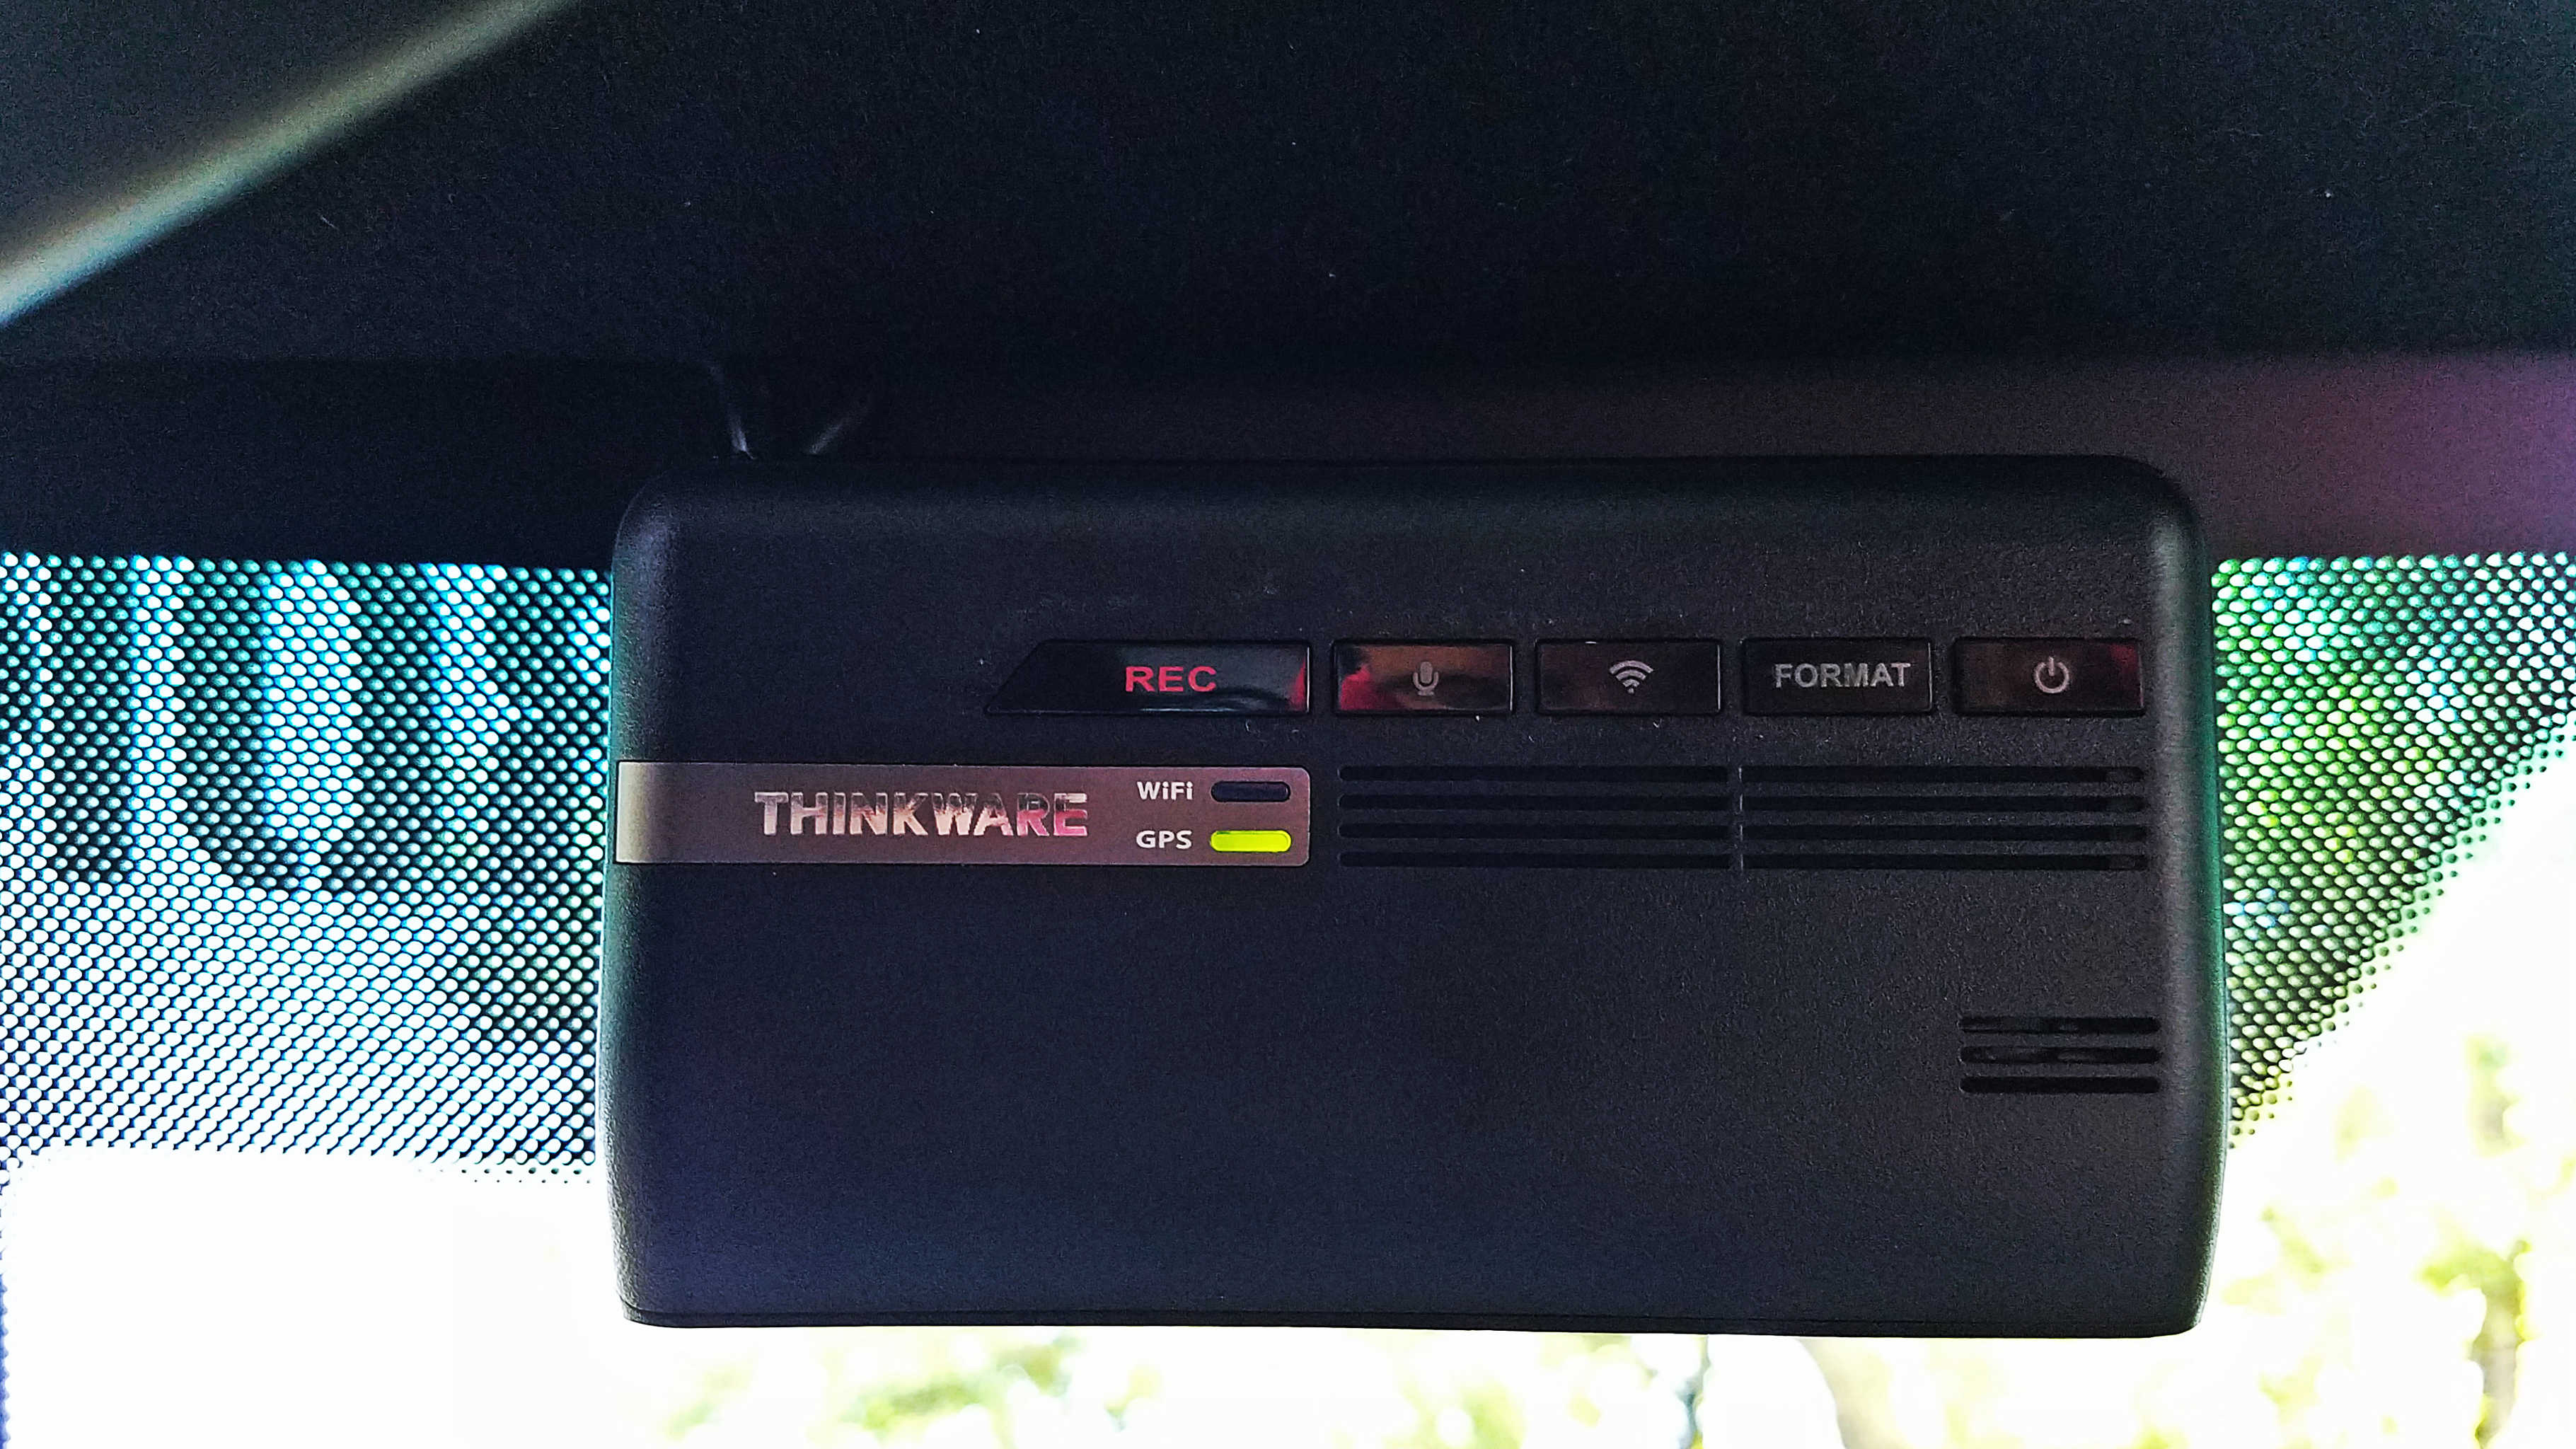
There are five buttons on the camera itself. From left to right, they are:
- Manual Recording: If you want to capture something interesting without needing to go back and search through existing clips, pressing this button automatically records the previous 10 seconds, and the following 50 seconds (1 minute total) in a separate clip, stored in a separate folder so as to not be overwritten.
- Audio Recording Toggle: This is basically just a privacy button that toggles audio recording on and off.
- Wi-Fi Toggle: Enables/disables WiFi to connect to it with the smartphone app.
- Format: This reformats the memory card. Every so often (I want to say every two weeks or so, when I start the car, the camera will say “manually format memory card for data integrity” over and over until you press this button. As it says, this is to keep the card error-free, and mitigate the possibility that the card has secretly become corrupted, which you might not discover until you need to pull a clip, only to find the clip unreadable.
- Power Toggle: Holding this button down for several seconds shuts the camera down entirely.
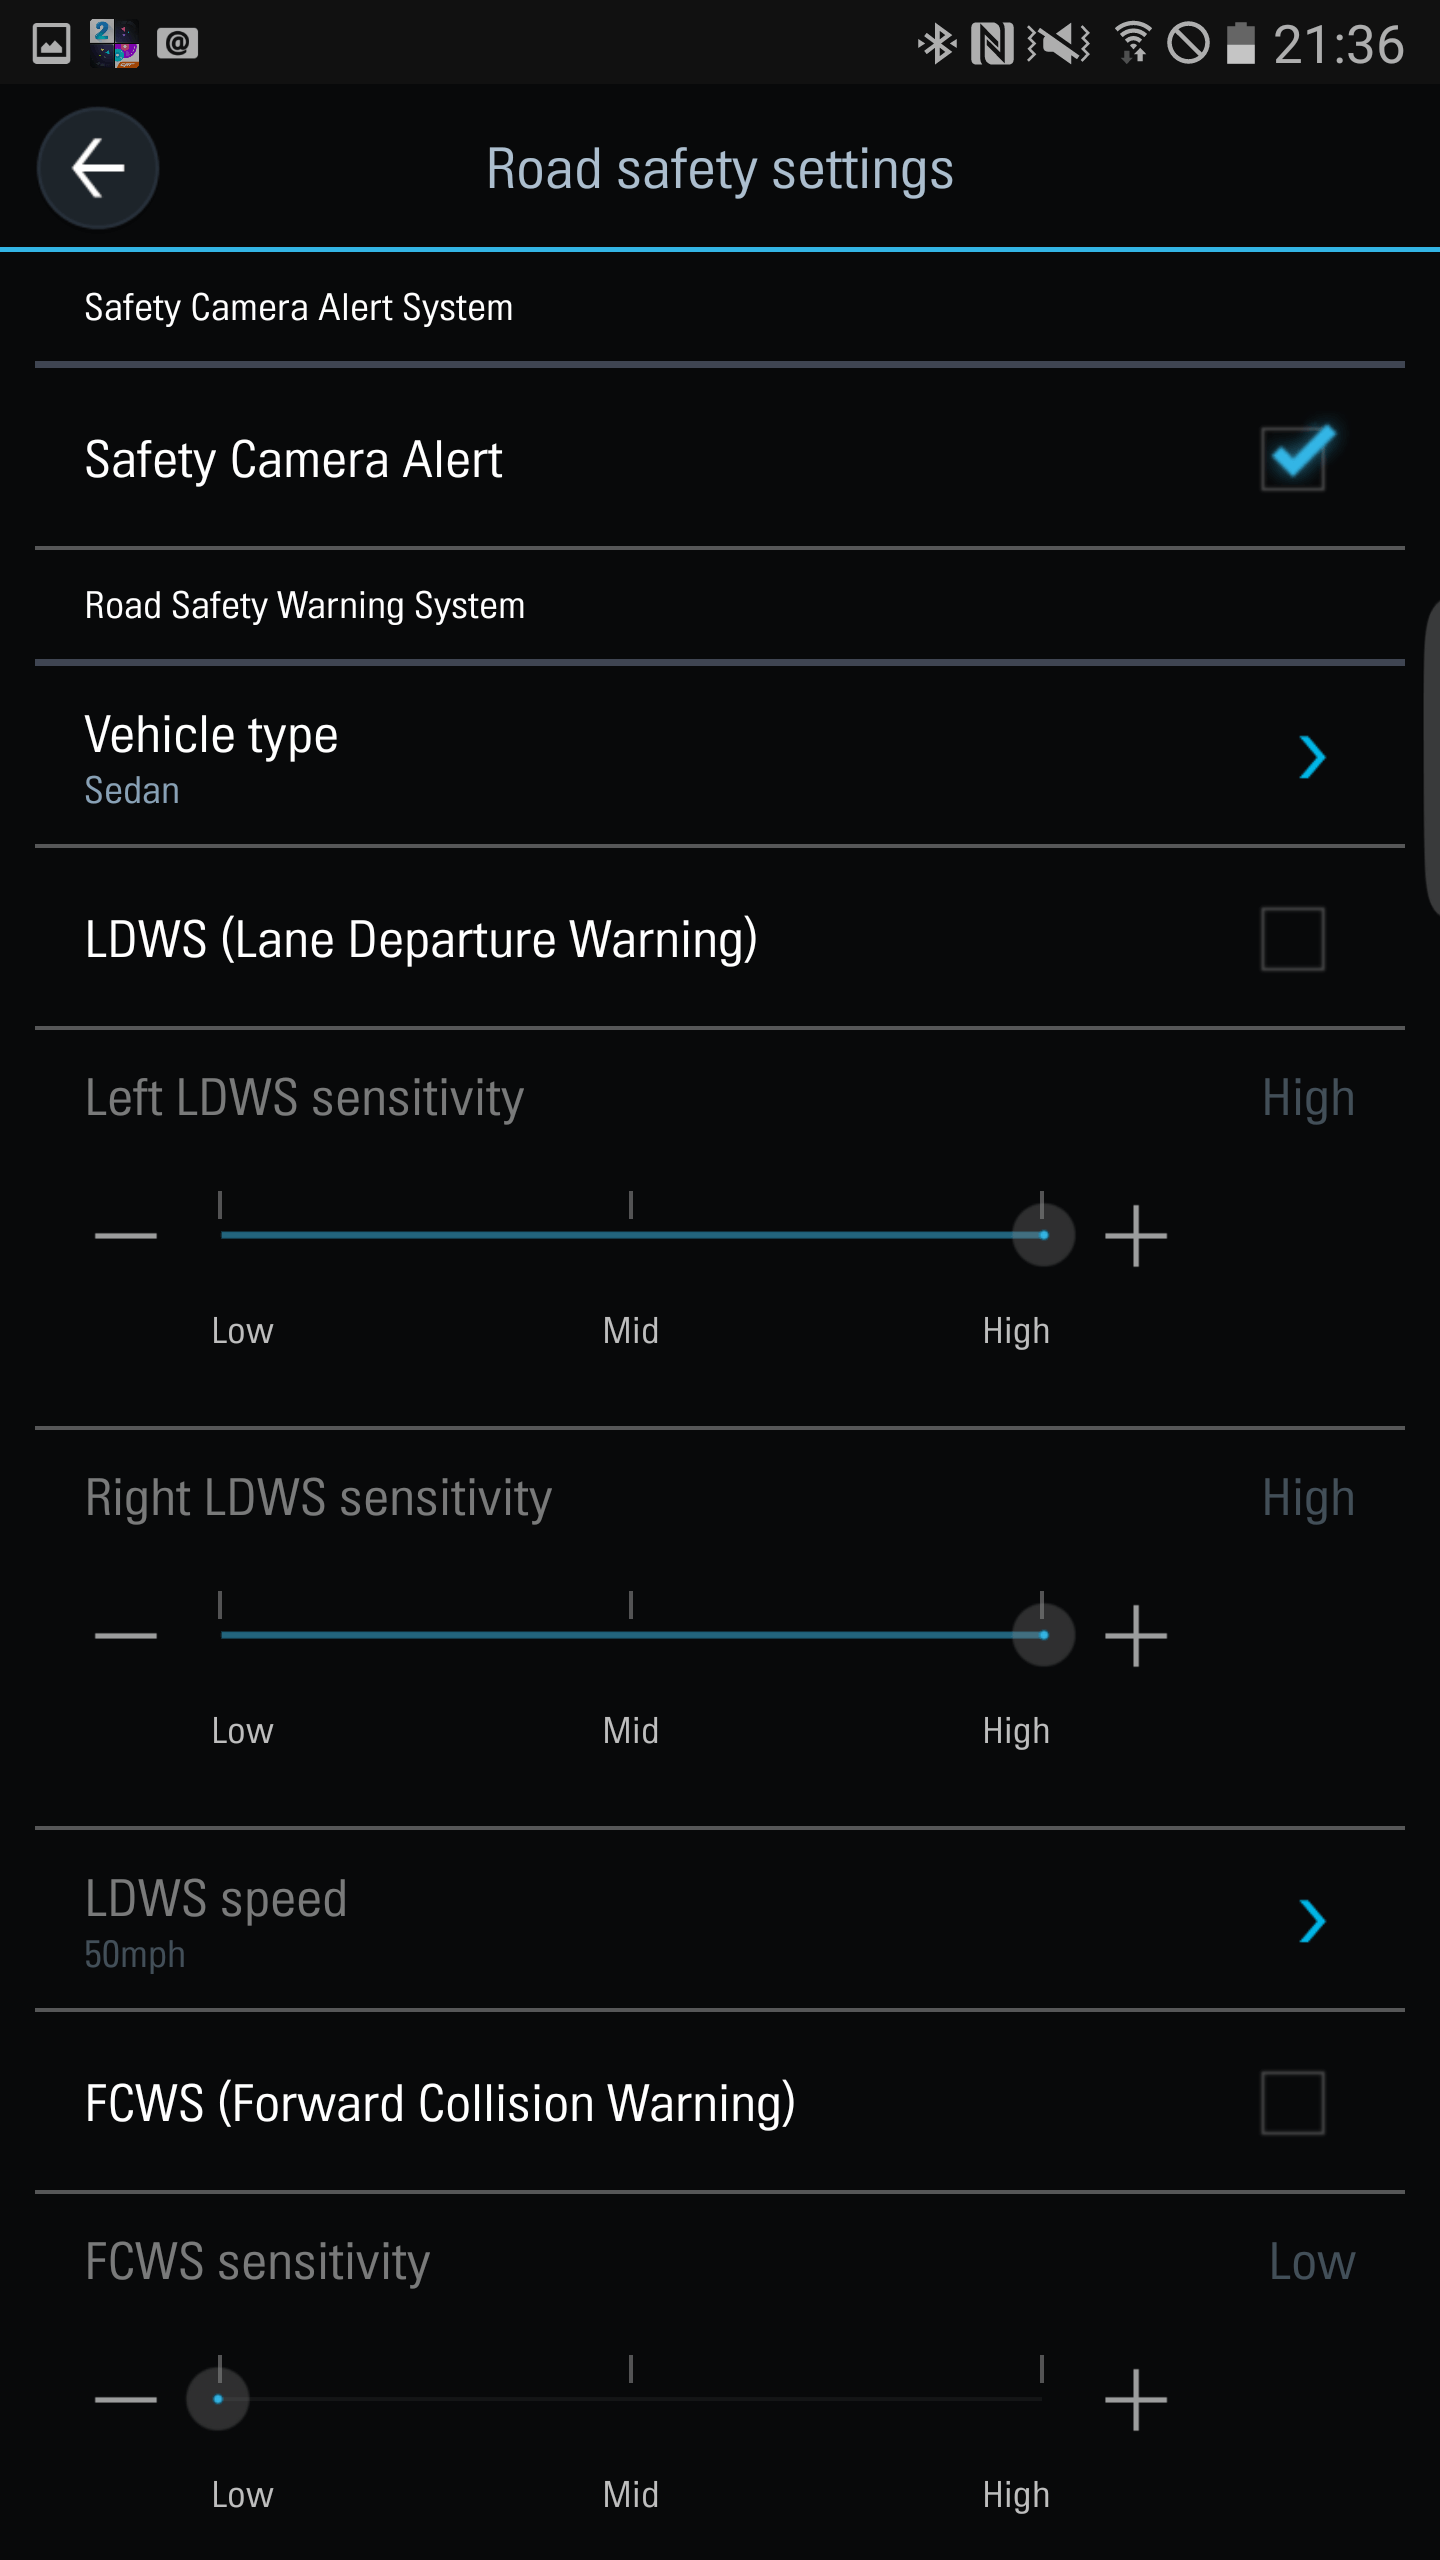
What impressed me most about this camera was the Smartphone app. It is a very polished application (you can see some screenshots below.) Very intuitively laid out, allowing you to configure all sorts of settings, browse stored clips (and either save them to your phone, or stream them straight from the camera), and even see a live view from the camera to aid you in mounting and adjusting it. There are also sensitivity settings not just for the camera images, but for other features such as lane-departure warning, and forward collision warning (both of which I have disabled and have yet to test.) I have yet to have any issues with the app, and am very pleased with how it operates.


Results (UPDATED: 16 Months Later!!!)
So, how does it all work? I’ve now had this camera for 16 months, and without beating around the bush, I haven’t had any issues with it, but let’s start with the short list of complaints which I do have, before we go over all the reasons why I love this camera:
- The chrome camera bezels and rear LED indicator. This is subjective as some people might like these features, but I prefer stealth over glamour for my dashcam. This is easily fixed with some black nail polish, or a sharpie, or even tape.
- The buttons on the camera itself are a bit loose, and rattle. I don’t hear them myself while I’m driving, but the camera microphone picks up that noise, which you can hear in the background in some of the clips below. Ideally I would like to see a revision in which the hard plastic buttons are replaced with soft-touch, rubber buttons, which would resolve that issue. Another simple fix, but something which needs to be done by Thinkware.
- Video transfer speed over Wi-Fi could be a bit faster. Most of the time, when I’m reviewing clips on my phone, the video has to buffer every 10 seconds unless you pause the video for a bit. Not a huge deal, but I would like to see the throughput increased so that this wasn’t an issue, which would also make downloading clips to the phone faster than it is at present. I’m really nit-picking here, but those are my gripes.
With that out of the way, this camera is fantastic. In 16 months, I have yet to have ANY reliability issues. This includes operation in everything from sunny, boiling hot days, to snowy, well-below-freezing days. It reliably starts up when I start my car, and reliably goes into parking mode when I shut it off. It also reliably shuts itself off without killing my battery when the car is parked for extended periods. The app works very reliably; something which I was convinced would be a weak point, but found myself proven wrong, and it is very easy and intuitive to use. I have pulled many clips over the past 16 months, and I have NEVER had an issue with the video being corrupted, or non-existent, and I also have never seen so much as even a TINY gap in recording between clips. String clips together in a video editor, and you would have no idea that they started out as separate files. Audi quality is also quite good. The microphone is super sensitive, which is actually not that great when you have the windows down at highway speeds, as the audio clips horribly. However, it’s a trade-off that means when your windows are up, or when your windows are down and you are at lower speeds, it picks up everything, which is great. I had a lady yell her head off at me from her car, and that meant that every single word she said was picked up on the audio, even when I started driving away and she was a car-length behind me.
As far as video quality, it is pretty good. This is no GoPro, but it’s also worth mentioning that this is processing and recording two simultaneous full-HD clips. Having said that, it’s more than adequate for my use. At low speeds, license plates are clearly legible during the day (or at night if they are properly illuminated). The only time it will struggle is if a car passes by you very quickly. At that point the bitrate simply doesn’t allow for crystal clear imagery without some blocking and artifacts, and it can be difficult, if not impossible to make out a plate number in all but the best lighting. However, you can usually make out at least a partial plate.
I also really like the time-lapse mode for parking. Reviewing those clips can very quickly give you a good idea of what transpired around your car while it was parked, which can come in handy when you’re trying to figure out what happened. It also makes for some fun clips of things like storms and whatnot, lol.
What follows are some of the more interesting clips I’ve caught with this camera over the past 16 months, but first, here is a quick compilation I threw together to demonstrate how the video looks from both cameras in both modes, both during the day and at night.
- Continuous Driving Front (Day) *excess noise is because my windows were down*
- Continuous Driving Rear (Day) *excess noise is because my windows were down*
- Continuous Driving Front (Night)
- Continuous Driving Rear (Night) *note the car behind me has his high-beams on*
- Timelapse Parking Front (Day)
- Timelapse Parking Rear (Day)
- Timelapse Parking Front (Night)
- Timelapse Parking Rear (Night)
Additional Fun Clips
The above video is a good demonstration of some test footage, but we all love to watch stupid dash-cam crash compilations. To that end, here are a few interesting things I have captured in just the past 16 months. Although none of them have directly involved me, it’s easy to see from these clips how useful this will be if I’m ever directly involved in a collision. I can definitely say that after 16 months with this camera, I will never own another car without a dash cam. It gives you the same sense of security that you get from having insurance on your car, knowing that you won’t have to fight to prove your side of a story (something I have had to do in the past.) Anyway, enjoy these clips! They are in decreasing order of “excitement,” but I included them all as they show the video quality in different lighting/weather conditions. Make sure you view them in full 1080p if you want to see the camera at its best 🙂


Hey fellow Series.Blue owner!
I may have missed it in your write up, but what hardwiring kit did you go with? I’m looking to get a dash cam for all the same reasons you listed and after reading your write up and watching your videos I’m sold! Any complaints since you’ve installed it? And did you ever get your windows tinted?
I’m so sorry; I wasn’t being notified of new comments for some reason. It’s probably too late now, but I just used the hardwiring kit offered by BlackBoxMyCar when you purchase the camera, along with two Add-A-Fuse adapters for the fuse box. I still have no complaints 🙂
And no, I sill haven’t gotten around to getting my windows tinted!